Change the group policy applied to the PC
This section describes how to change the group policy applied to a PC.
By changing the group policy, you can reflect the “two-factor authentication settings” set in that group policy to the PC.

Operation Procedure
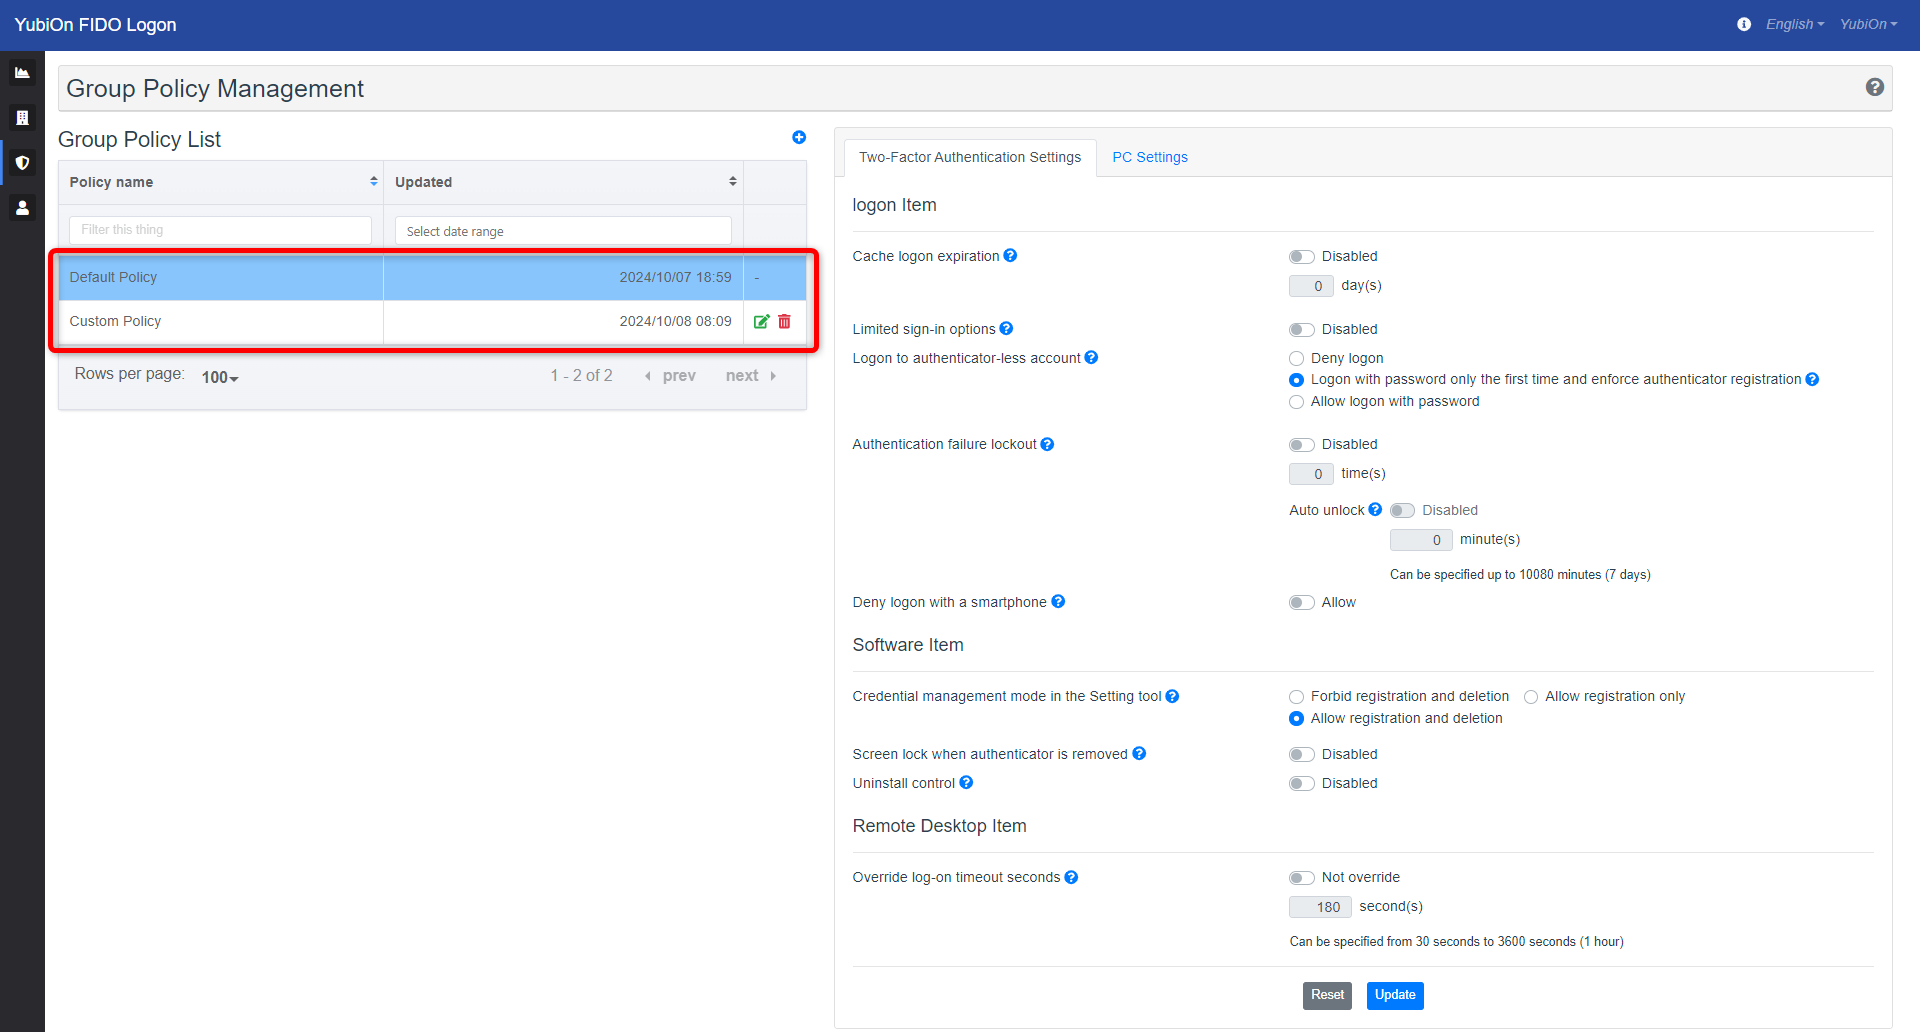
Select Authentication Service > Group Policy from the menu.
-
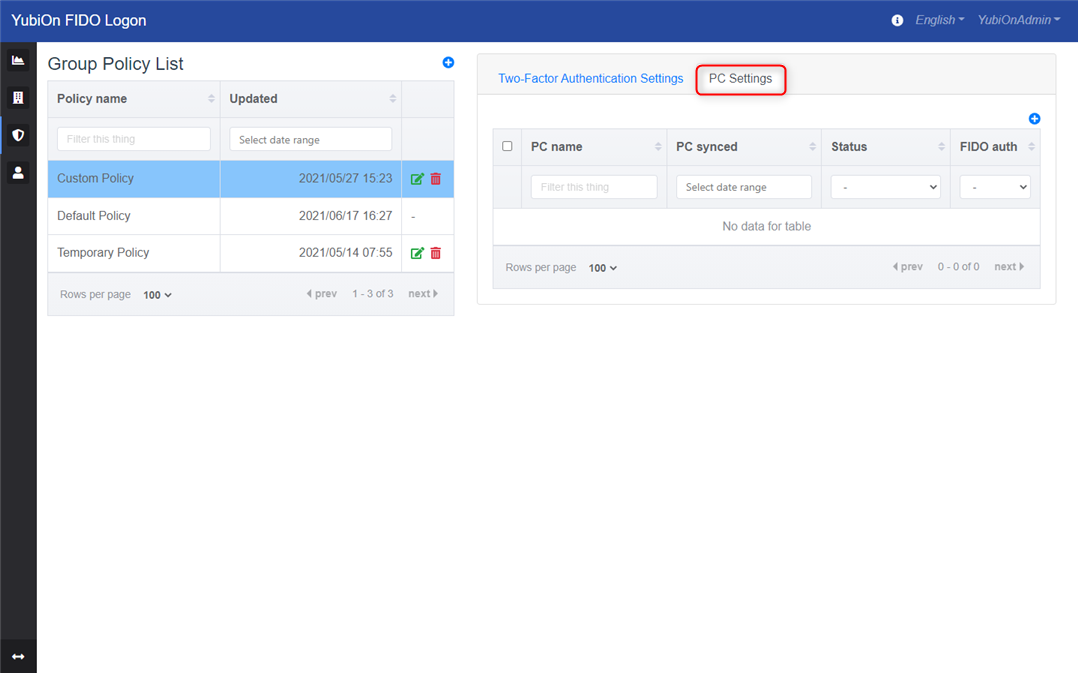
Click the policy you want to configure from the group policy list.
-
Click on the “PC Settings” tab.
-
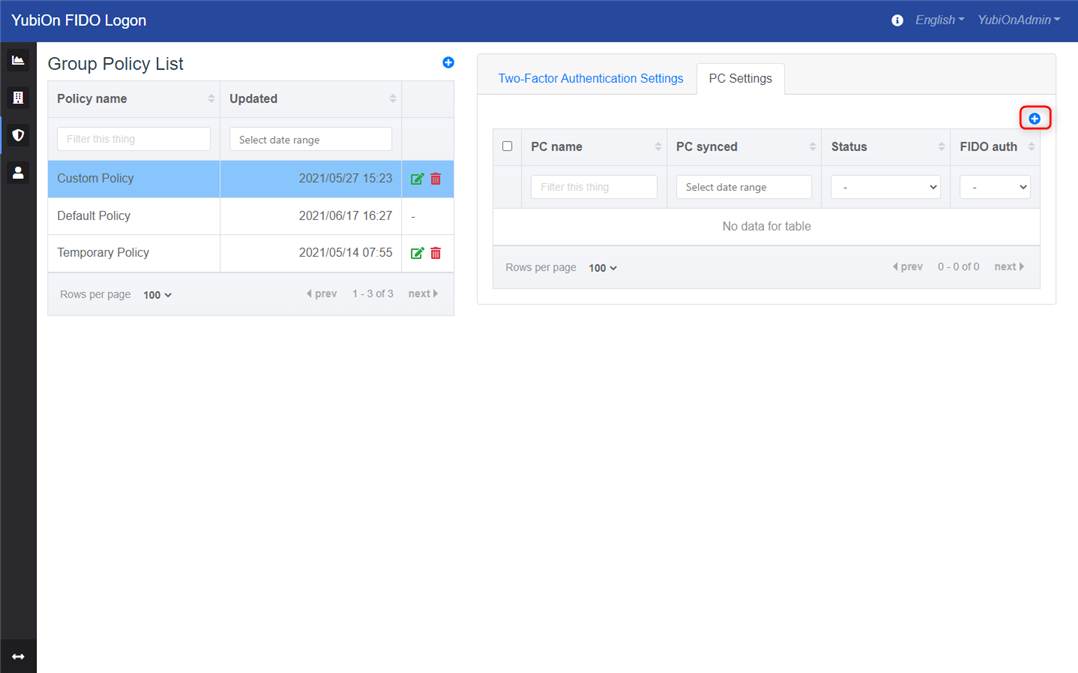
Click the Add icon in the upper right corner.
-
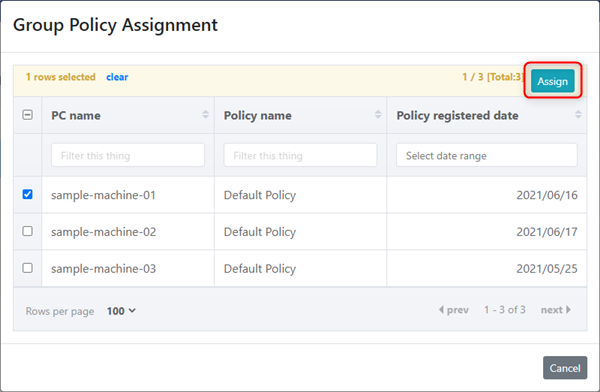
In the Group Policy Assignment modal screen, find the name of the PC for which you want to make the settings and check the checkbox.

PCs that have already been configured for the selected group policy will not appear in the list.
-
Click on the “Assign” button.
-
Click “OK” on the confirmation message.
-
The modal screen will close and the change will be complete. Confirm that the PC has been added to the list.
Immediately after changing the group policy, the settings are not yet reflected on the device; they will be reflected when the PC communicates with the server.
You can check if the changed policy is reflected by the icon status in the list.
Before reflection

After reflection
