Account Screen
This screen displays the Windows account and authenticator assignments. The account information will be automatically sent from the PC where the registration was done with the registration code.

- Account Type
Switches the type of Windows account to be displayed.
Local
Click to display Windows local accounts in the list.
Domain
Click to display the Windows domain account (ActiveDirectory / AzureAD) in the list.
List of accounts (local)
Displays information on the list of registered local accounts.
-
PC name
Displays the PC name. -
Account ID
Displays the account ID of the Windows account. -
Display name
Displays the display name of your Windows account. -
Emergency logon
The icon displays the emergency logon status of the target account.
Emergency logon settings can be configured by clicking the icon.
-
Authenticator
The status of the authenticator registration is displayed by the icon.
You can register, edit, or delete authenticators by clicking the icon.
-
Registered
Displays the date when the target account was registered. -
Delete icon
This icon is for deleting the target account. -
Deleted account list
This icon displays a list of deleted accounts.
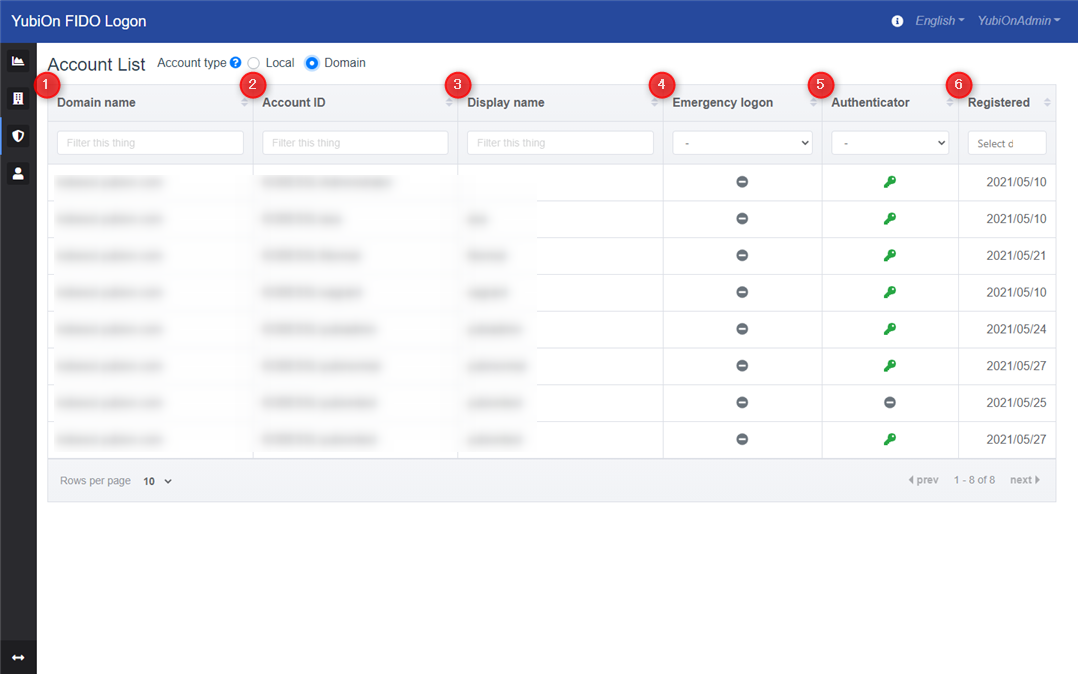
List of accounts (domains)
Lists the domain accounts that have been registered.
-
Domain name.
Displays the domain name.
If you are using ActiveDirectory, it will display the ActiveDirectory domain name, and if you are using AzureAD, it will display the fixed “AzureAD”. -
Account ID
Displays the account ID of the Windows account. -
Display name
Displays the display name of your Windows account. -
Emergency logon
The icon displays the emergency logon status of the target account.
Emergency logon settings can be configured by clicking the icon. -
Authenticator
The status of the authenticator registration is displayed by the icon.
You can register, edit, or delete authenticators by clicking the icon. -
Registered
Displays the date when the target account was registered. -
Delete icon
This icon is for deleting the target account. -
Deleted account list
This icon displays a list of deleted accounts. -
Domain account batch registration icon
Displays a modal for batch registration of domain accounts.
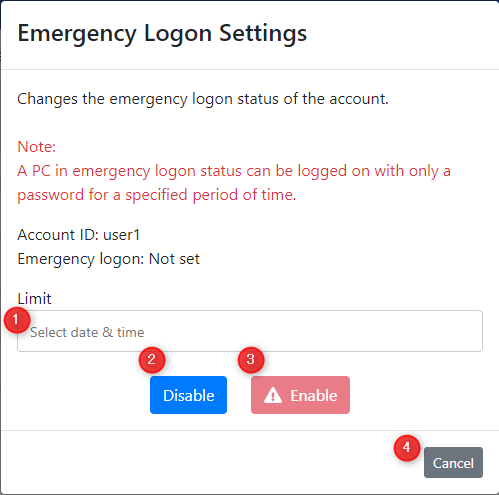
Emergency Logon Settings
This is the settings modal screen that appears when you click on the emergency logon icon.
You can enable or disable emergency logon.
-
Limit
Set the expiration date and time for the emergency logon. -
Disable Button
Toggles emergency logon off. -
Enable Button
Toggles emergency logon on and off. If you set the “Limit”, you will be able to click on it. -
Cancel Button
Return without setting an emergency logon.
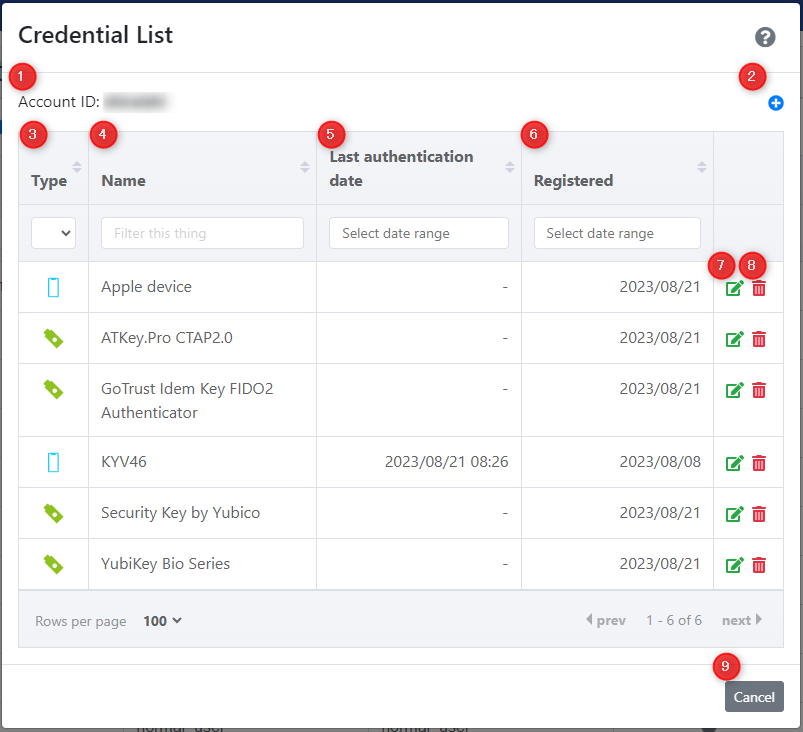
Authenticator Settings
This is the settings modal screen that appears when you click on the authenticator icon.
Configure the authenticator registration, editing, and deletion settings for the selected account.
-
Account ID
Displays the account ID of the currently selected account. -
Add icon
This icon is used to register a new authenticator. -
Type
Displays the type of authenticator (security key/smartphone) as an icon. -
Name
Displays the registered names of the authenticators that have been assigned and registered. -
Last authentication date
Displays the date and time when the registered authenticator was last used for authentication. -
Registered
Displays the date when the authenticator was registered. -
Edit icon
This icon is used to edit the registered name of a registered authenticator. -
Delete icon
This icon is used to cancel a registered authenticator. -
Cancel Button
This is the button to return without setting the authenticator.
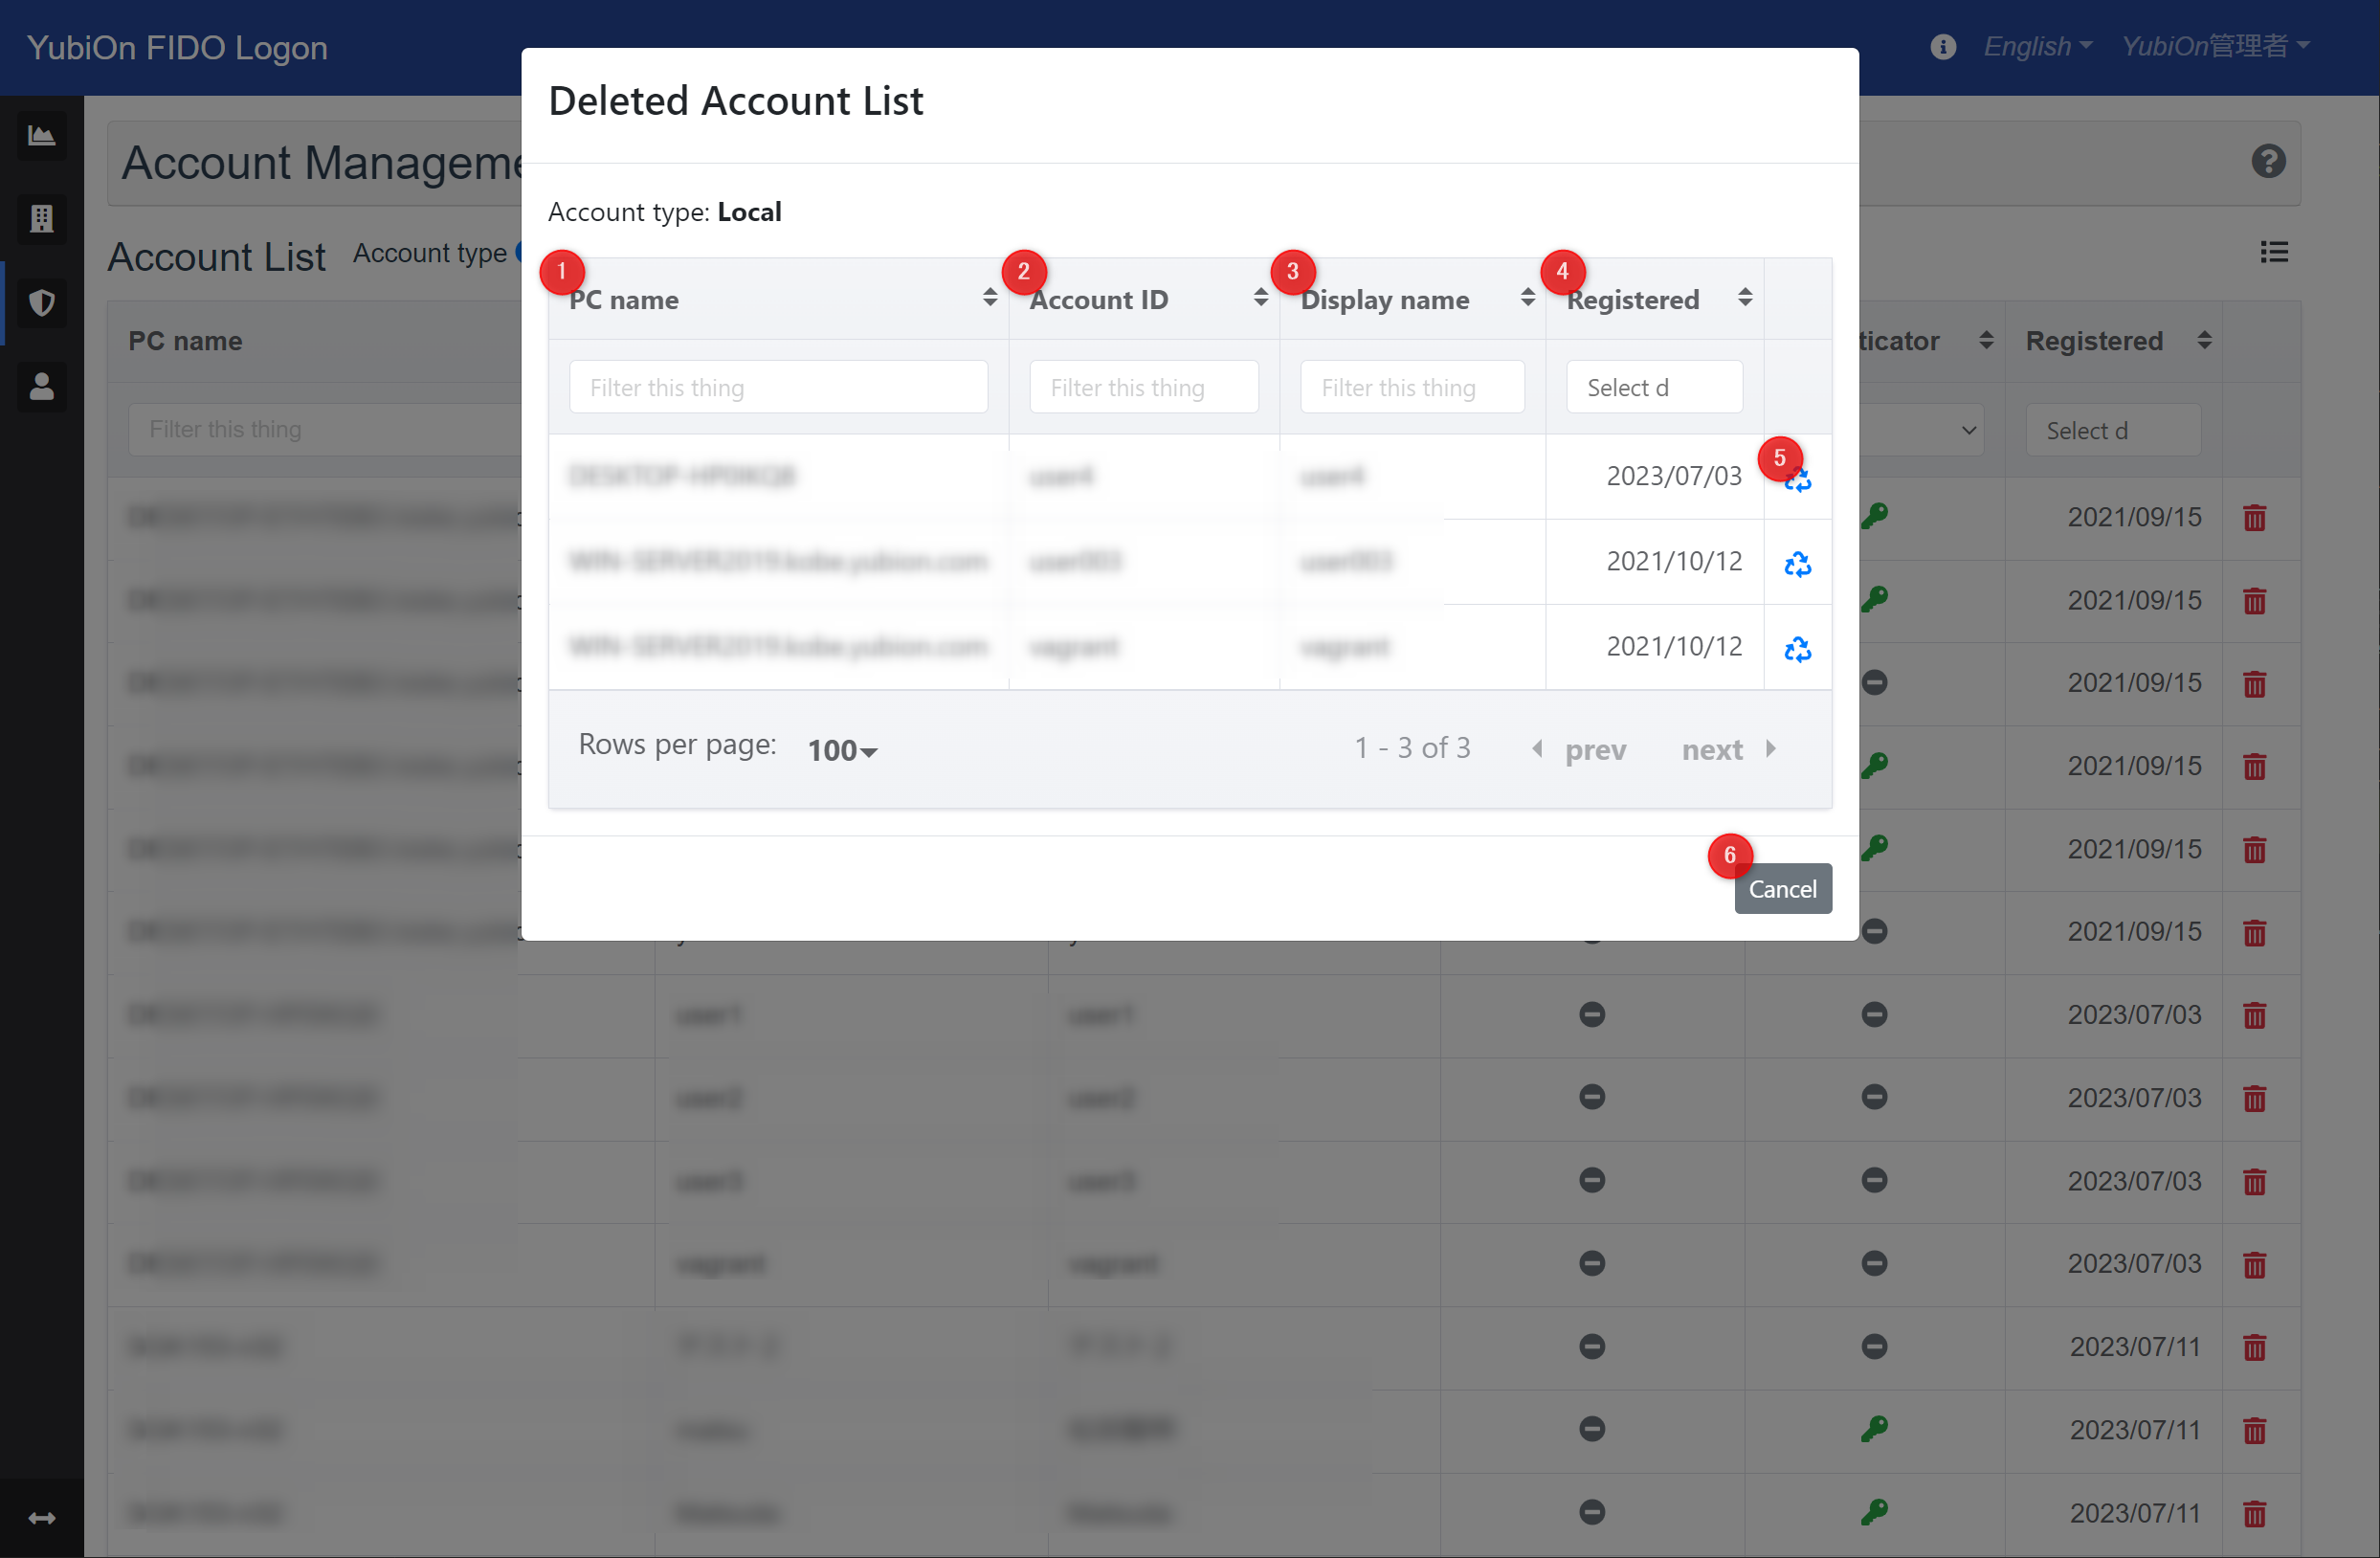
Deleted Account List(Local)
This is the list modal that appears when you click the Deleted Account List icon with “Local” selected for account type.
Deleted local accounts are listed.
-
PC name
Displays the PC name. -
Account ID
Displays the account ID of the Windows account. -
Display name
Displays the display name of your Windows account. -
Registered
Displays the date when the target account was registered. -
Restoration icon
This icon restores a deleted account. -
Cancel Button
A button to close the modal.
Deleted Account List(Domain)
This is the list modal that appears when you click the Deleted Account List icon with “Domain” selected for the account type.
Deleted domain accounts are listed.
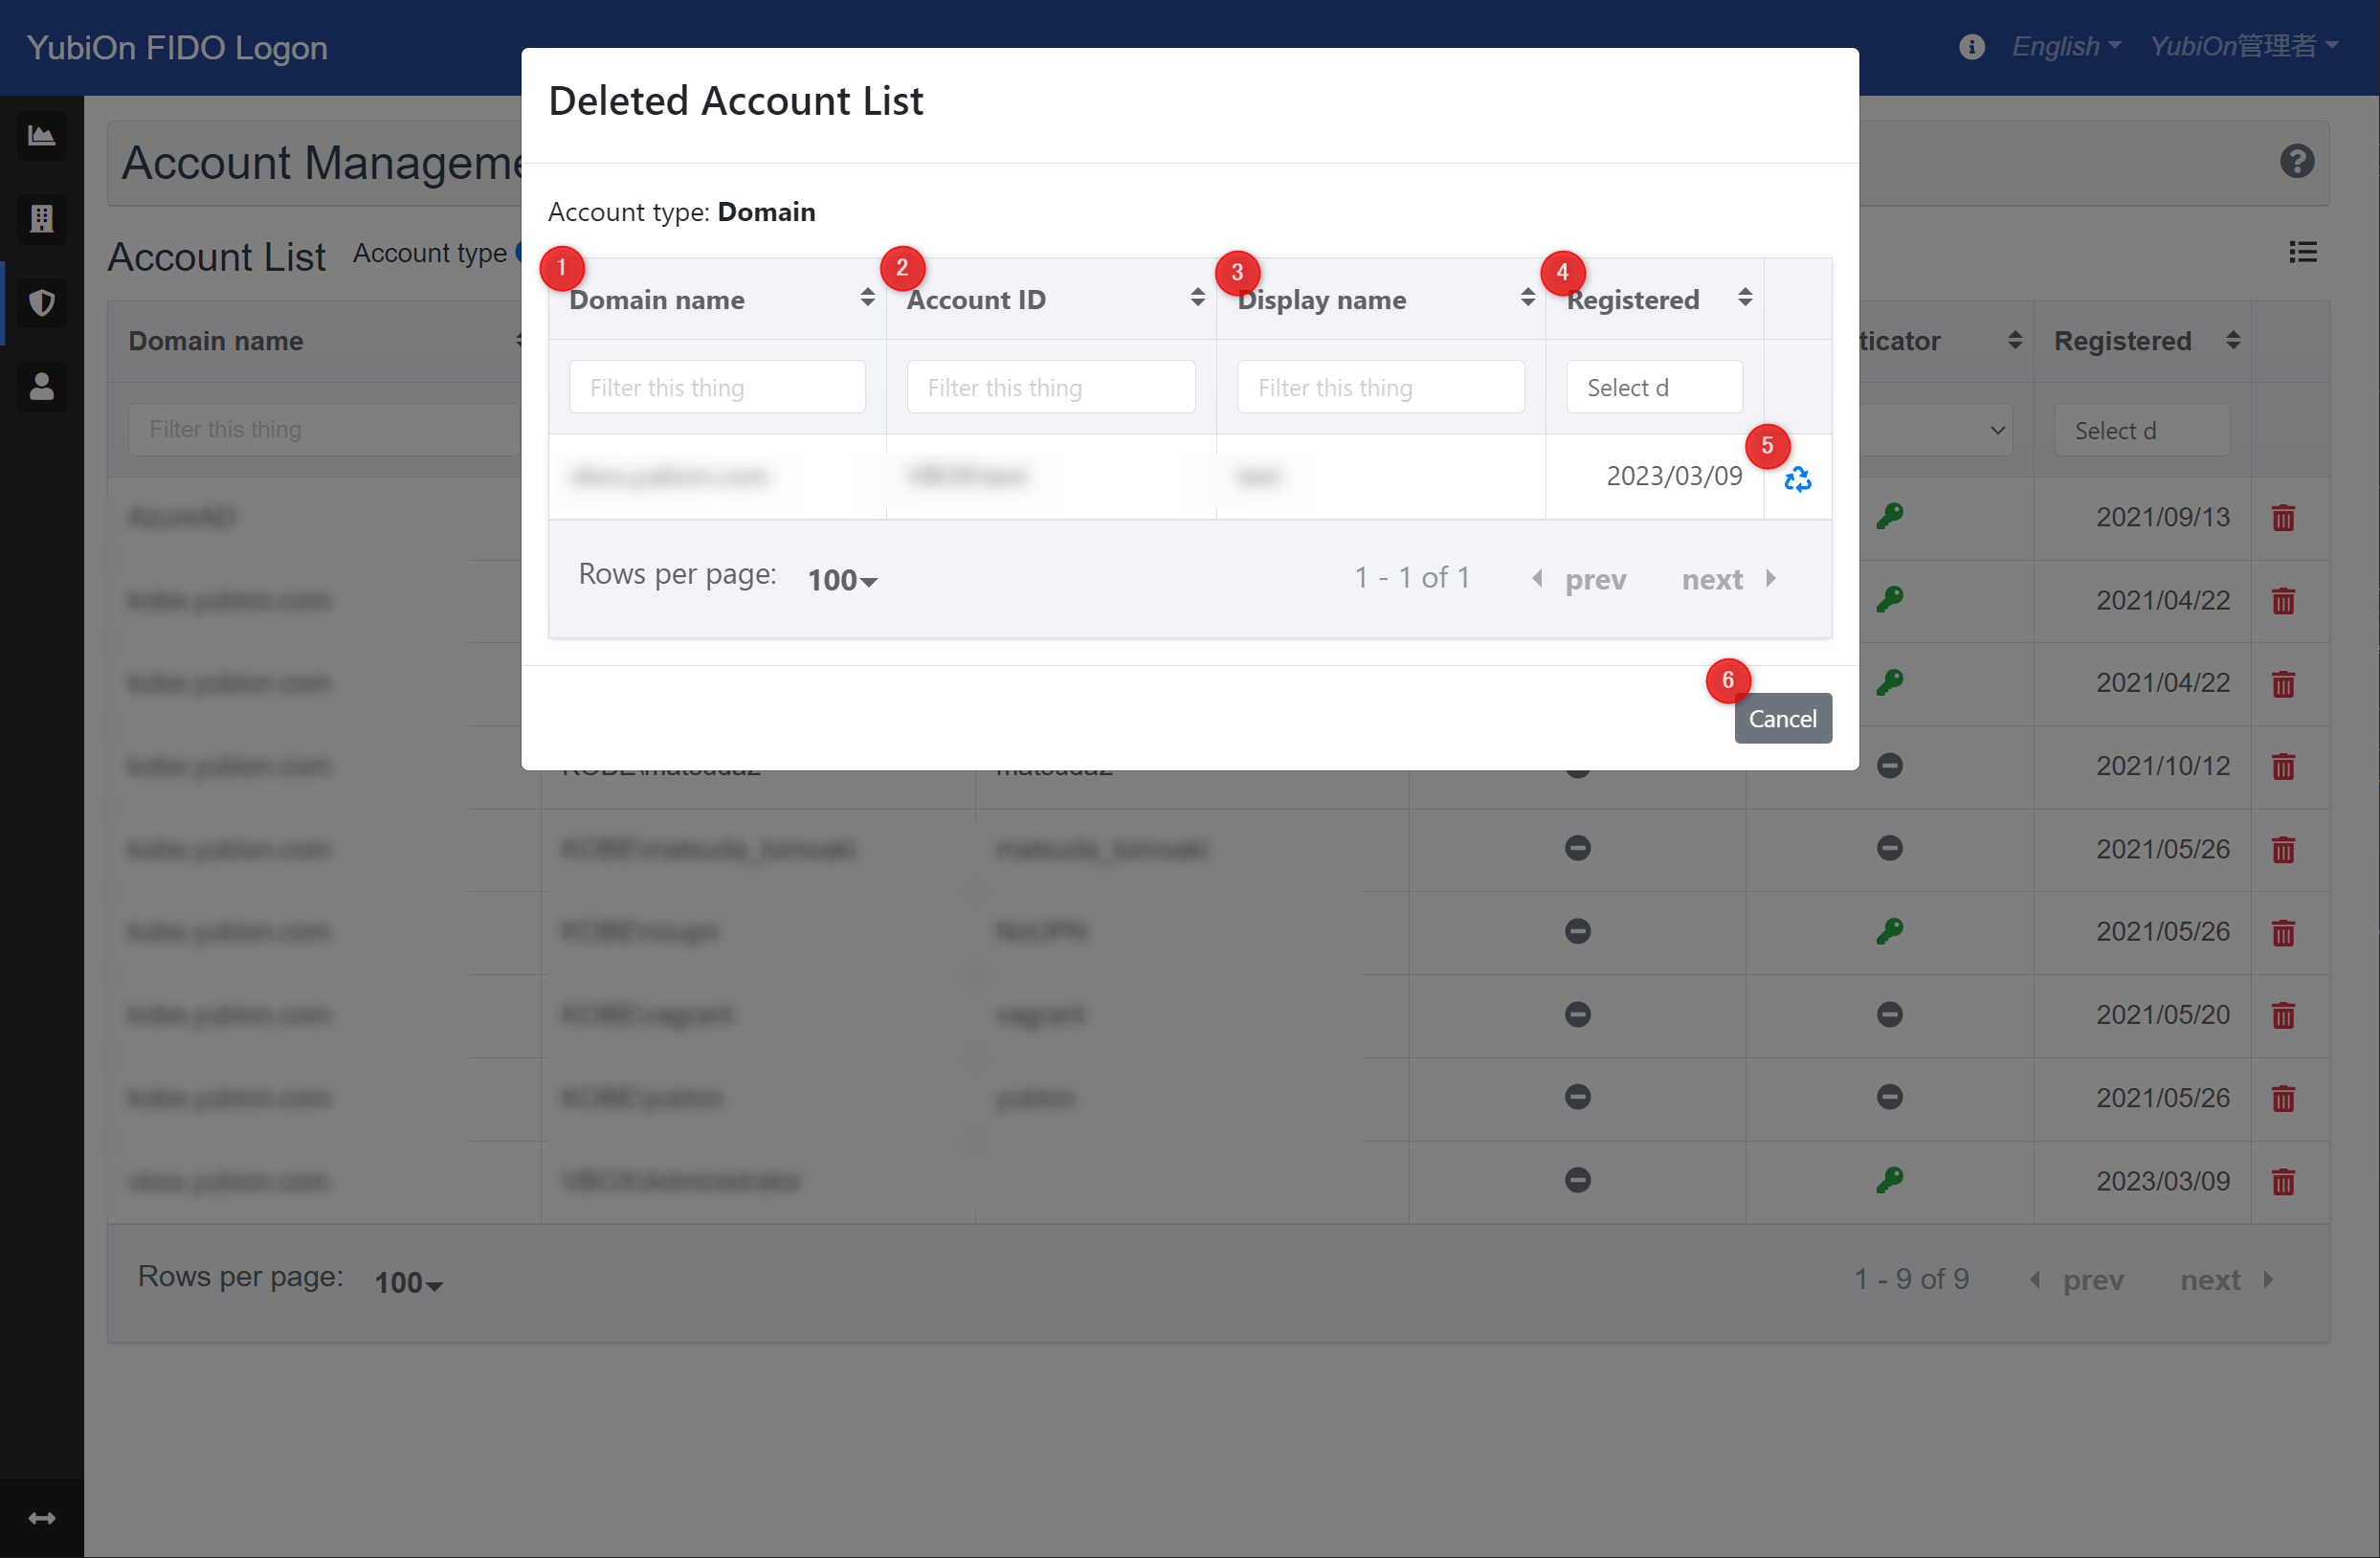
-
Domain name.
Displays the domain name. -
Account ID
Displays the account ID of the Windows account. -
Display name
Displays the display name of your Windows account. -
Registered
Displays the date when the target account was registered. -
Restoration icon
This icon restores a deleted account. -
Cancel Button
A button to close the modal.
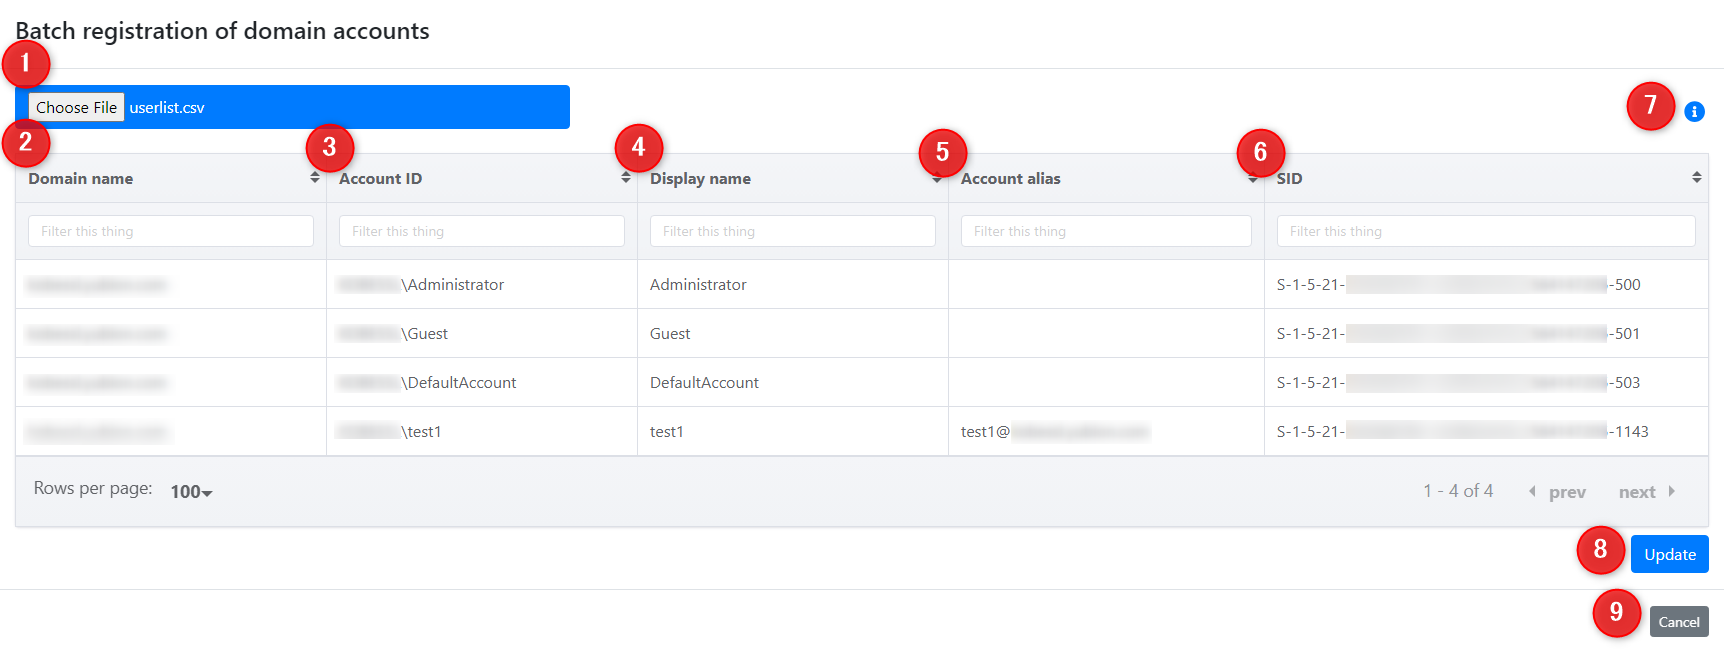
Domain Accounts Batch Registration
This can only be performed when the account type is “Domain” (icon will appear).
You will need to obtain a CSV for account registration on your domain server.
How to obtain CSV
-
Start a command prompt on the domain server.
-
Enter and execute the following command.
csvde -u -f userlist.csv -r objectCategory=user -
The CSV file is output to the directory where it was executed.
-
Choose File
When the file selection dialog appears, select the CSV file.
Selection is also possible by dragging and dropping files into the blue area.
By selecting a file, the contents of the CSV are parsed and the account information to be registered is listed. -
Domain name
Displays the domain name.
If you are using ActiveDirectory, it will display the ActiveDirectory domain name, and if you are using AzureAD, it will display the fixed “AzureAD”. -
Account ID
Displays the account ID of the Windows account. -
Display name
Displays the display name of the Windows account. -
Account alias
Displays the alias of the Windows account. -
SID
Displays a security identifier to identify the account. -
How to obtain CSV Icon
A tooltip shows how to obtain the CSV.
The content is the same as “How to obtain CSV” above. -
Update button
Batch registration of account information displayed in the list as domain accounts. -
Cancel button
A button to close the modal.
Referenced CSV items
- Domain name : Concatenate DC attributes of DN item
- Account ID : Concatenate DC attribute of DN item with name item
- Display name : name item
- Account alias : userPrincipalName item
- SID : Processing objectSid item