Change the name of the registered authenticator
This section describes how to change the assigned registered names of Windows accounts and authenticators.
The name set here is an arbitrary name for the account and authenticator assignment.
Operation Procedure
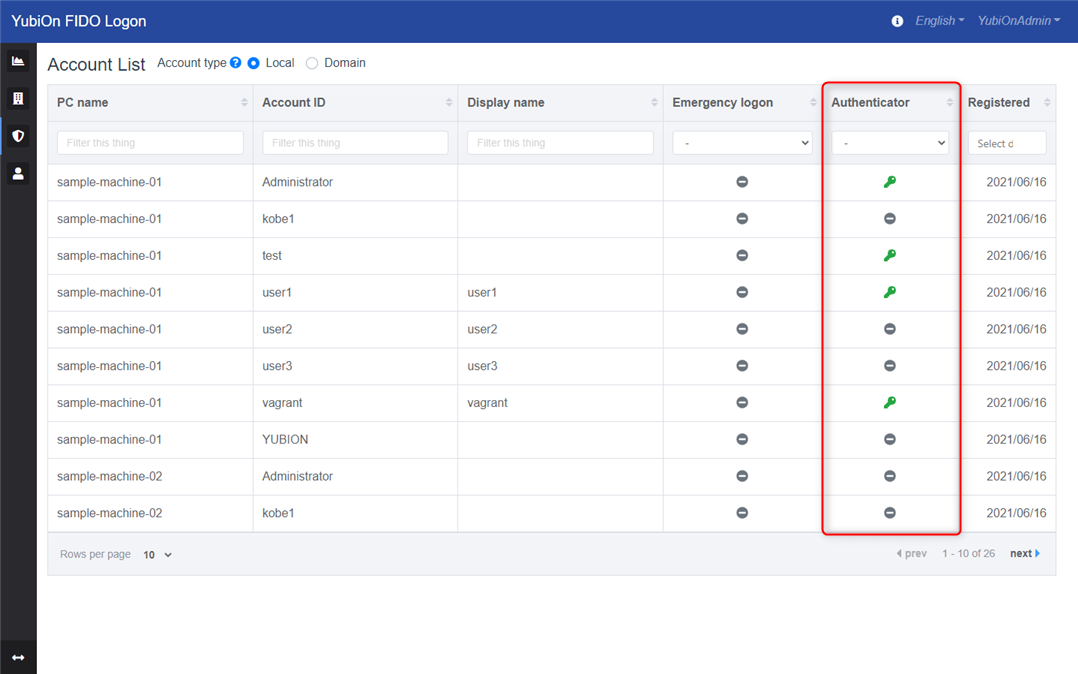
Select Authentication Services > Account from the menu.
- Find the target account in the account list.
-
For local accounts
Select “Local” for the account type. -
For domain accounts
Select “Domain” for the account type.
-
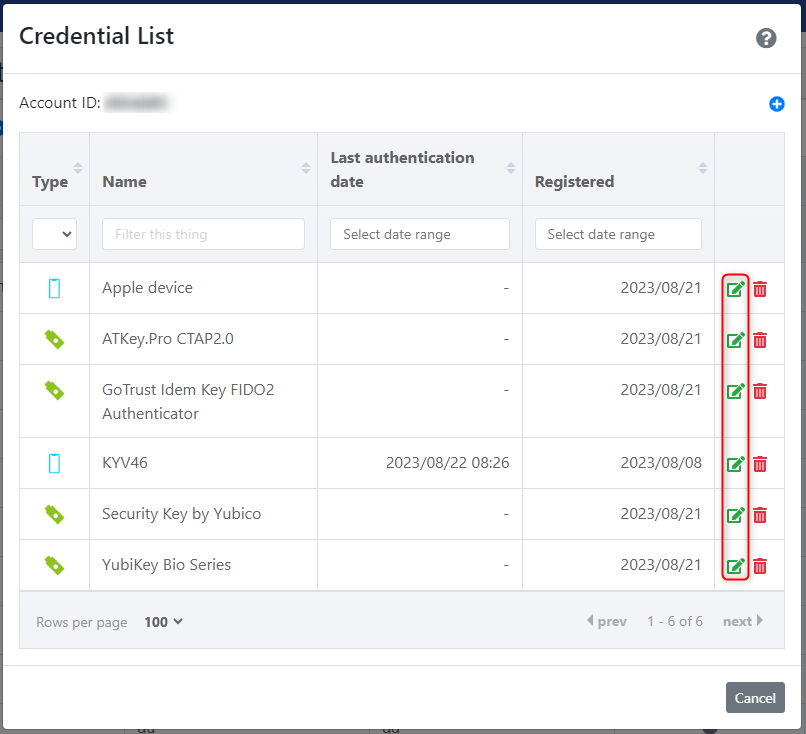
Click the credentials icon in the target account line to open the credentials list modal.
-
Find the name you want to change in the list of credentials, and click the edit icon on the target line.
-
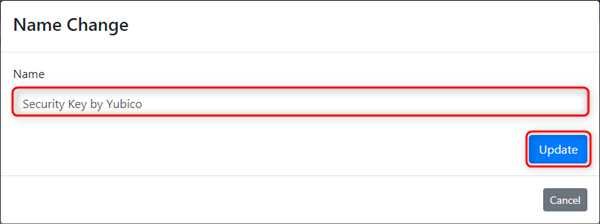
In the Rename modal that appears, enter a name and click the “Update” button.
-
Click “OK” on the confirmation message.
-
Click “OK” when you see the message that the update is complete.
Confirm that the name of the target has been changed from the list.