Enable emergency logon
This section describes a setting that temporarily allows users to log on to a PC using only a password without an authenticator (Emergency logon) when logging on to the target account.
Reflecting settings
The target PC must be online in order for the configured emergency logon status to be reflected on the target PC.
Enable emergency logon
This section describes how to enable emergency logon.
When Emergency Logon is enabled, the target account can temporarily log on to the PC with only a password, which is useful when logging on to the PC temporarily without using an authenticator, such as when the user forgets the FIDO authenticator. For more information about emergency logon mode, see Emergency logon mode in the User’s Manual.
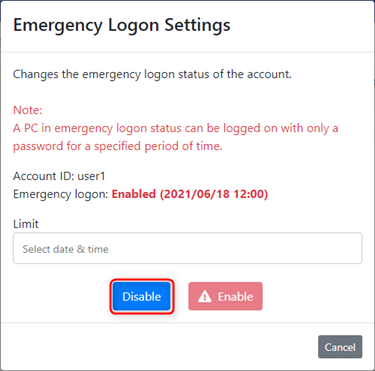
Operation Procedure
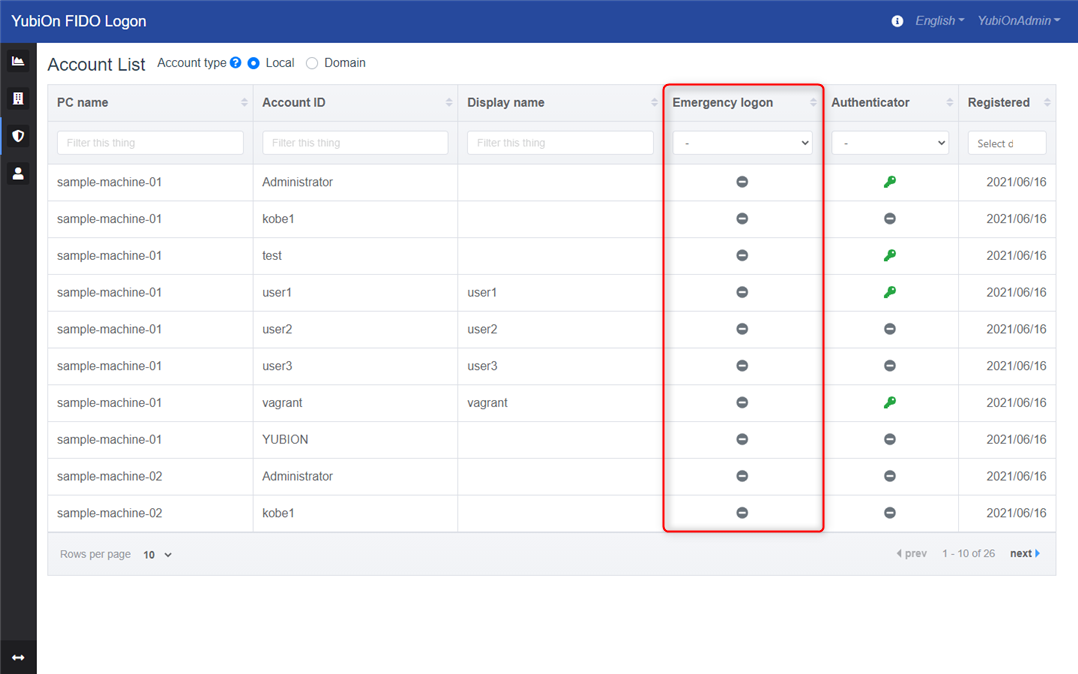
Select Authentication Services > Account from the menu.
- Find the target account in the account list.
-
For local accounts
Select “Local” for the account type. -
For domain accounts
Select “Domain” for the account type.
-
Click the emergency logon icon in the target account line to open the emergency logon settings modal.
-
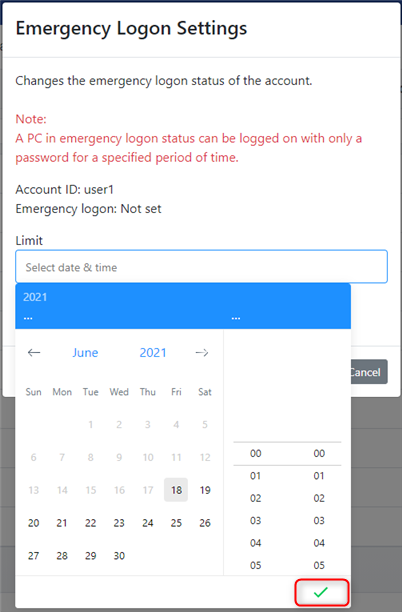
Click the Set Expiration Date box and select the expiration date and time in the calendar.
-
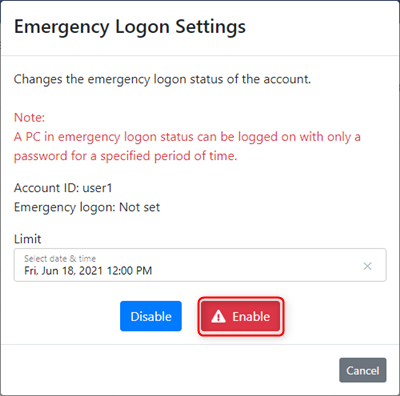
Click the “Enable” button.
-
Click “OK” on the confirmation message.
-
Click “OK” when the update is complete message appears.
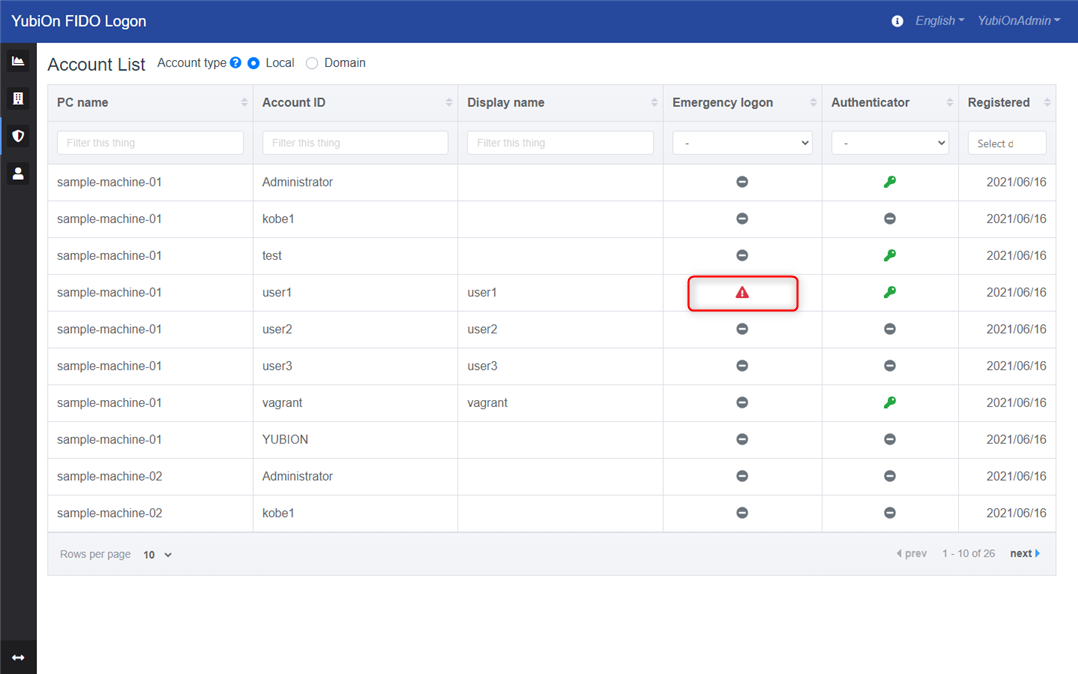
Confirm that the emergency logon icon appears in the “Emergency Logon” section.
About Expiration
The emergency logon status will be automatically canceled after the specified time limit has expired.
Disable emergency logon.
This section describes how to cancel the emergency logon that has been set.
Use this setting when you want to cancel the account set for emergency logon before the set expiration date. When the emergency logon is canceled, the logon returns to the normal logon using the FIDO authenticator.
Operation Procedure
Select Authentication Services > Account from the menu.
- Find the target account in the account list.
-
For local accounts
Select “Local” for the account type. -
For domain accounts
Select “Domain” for the account type.
-
Click the emergency logon icon in the target account line to open the emergency logon settings modal.

-
Click the “Disable” button.
-
Click “OK” on the confirmation message.

-
Click “OK” when you see the message that the update is complete.
Confirm that the emergency logon icon is no longer displayed in the “Status” field.