Unassign accounts and authenticators
Instructions for unassigning an enterprise authenticator from a Windows account are described below.
How to Unassign an Authenticator
You can unassign an enterprise authenticator from an account using either the Account Management Screen or the Enterprise Authenticator Management Screen.
Account Management Screen: Unassign the authenticator from a specific account.
Enterprise Authenticator Screen: Unassign the account associated with a specific authenticator.
- Settings from the Account Management Screen
- Settings from the Enterprise Authenticator Management Screen
Settings from the Account Management Screen
In the Account Management Screen, you can unassign an enterprise authenticator from an account.
Operation Procedure
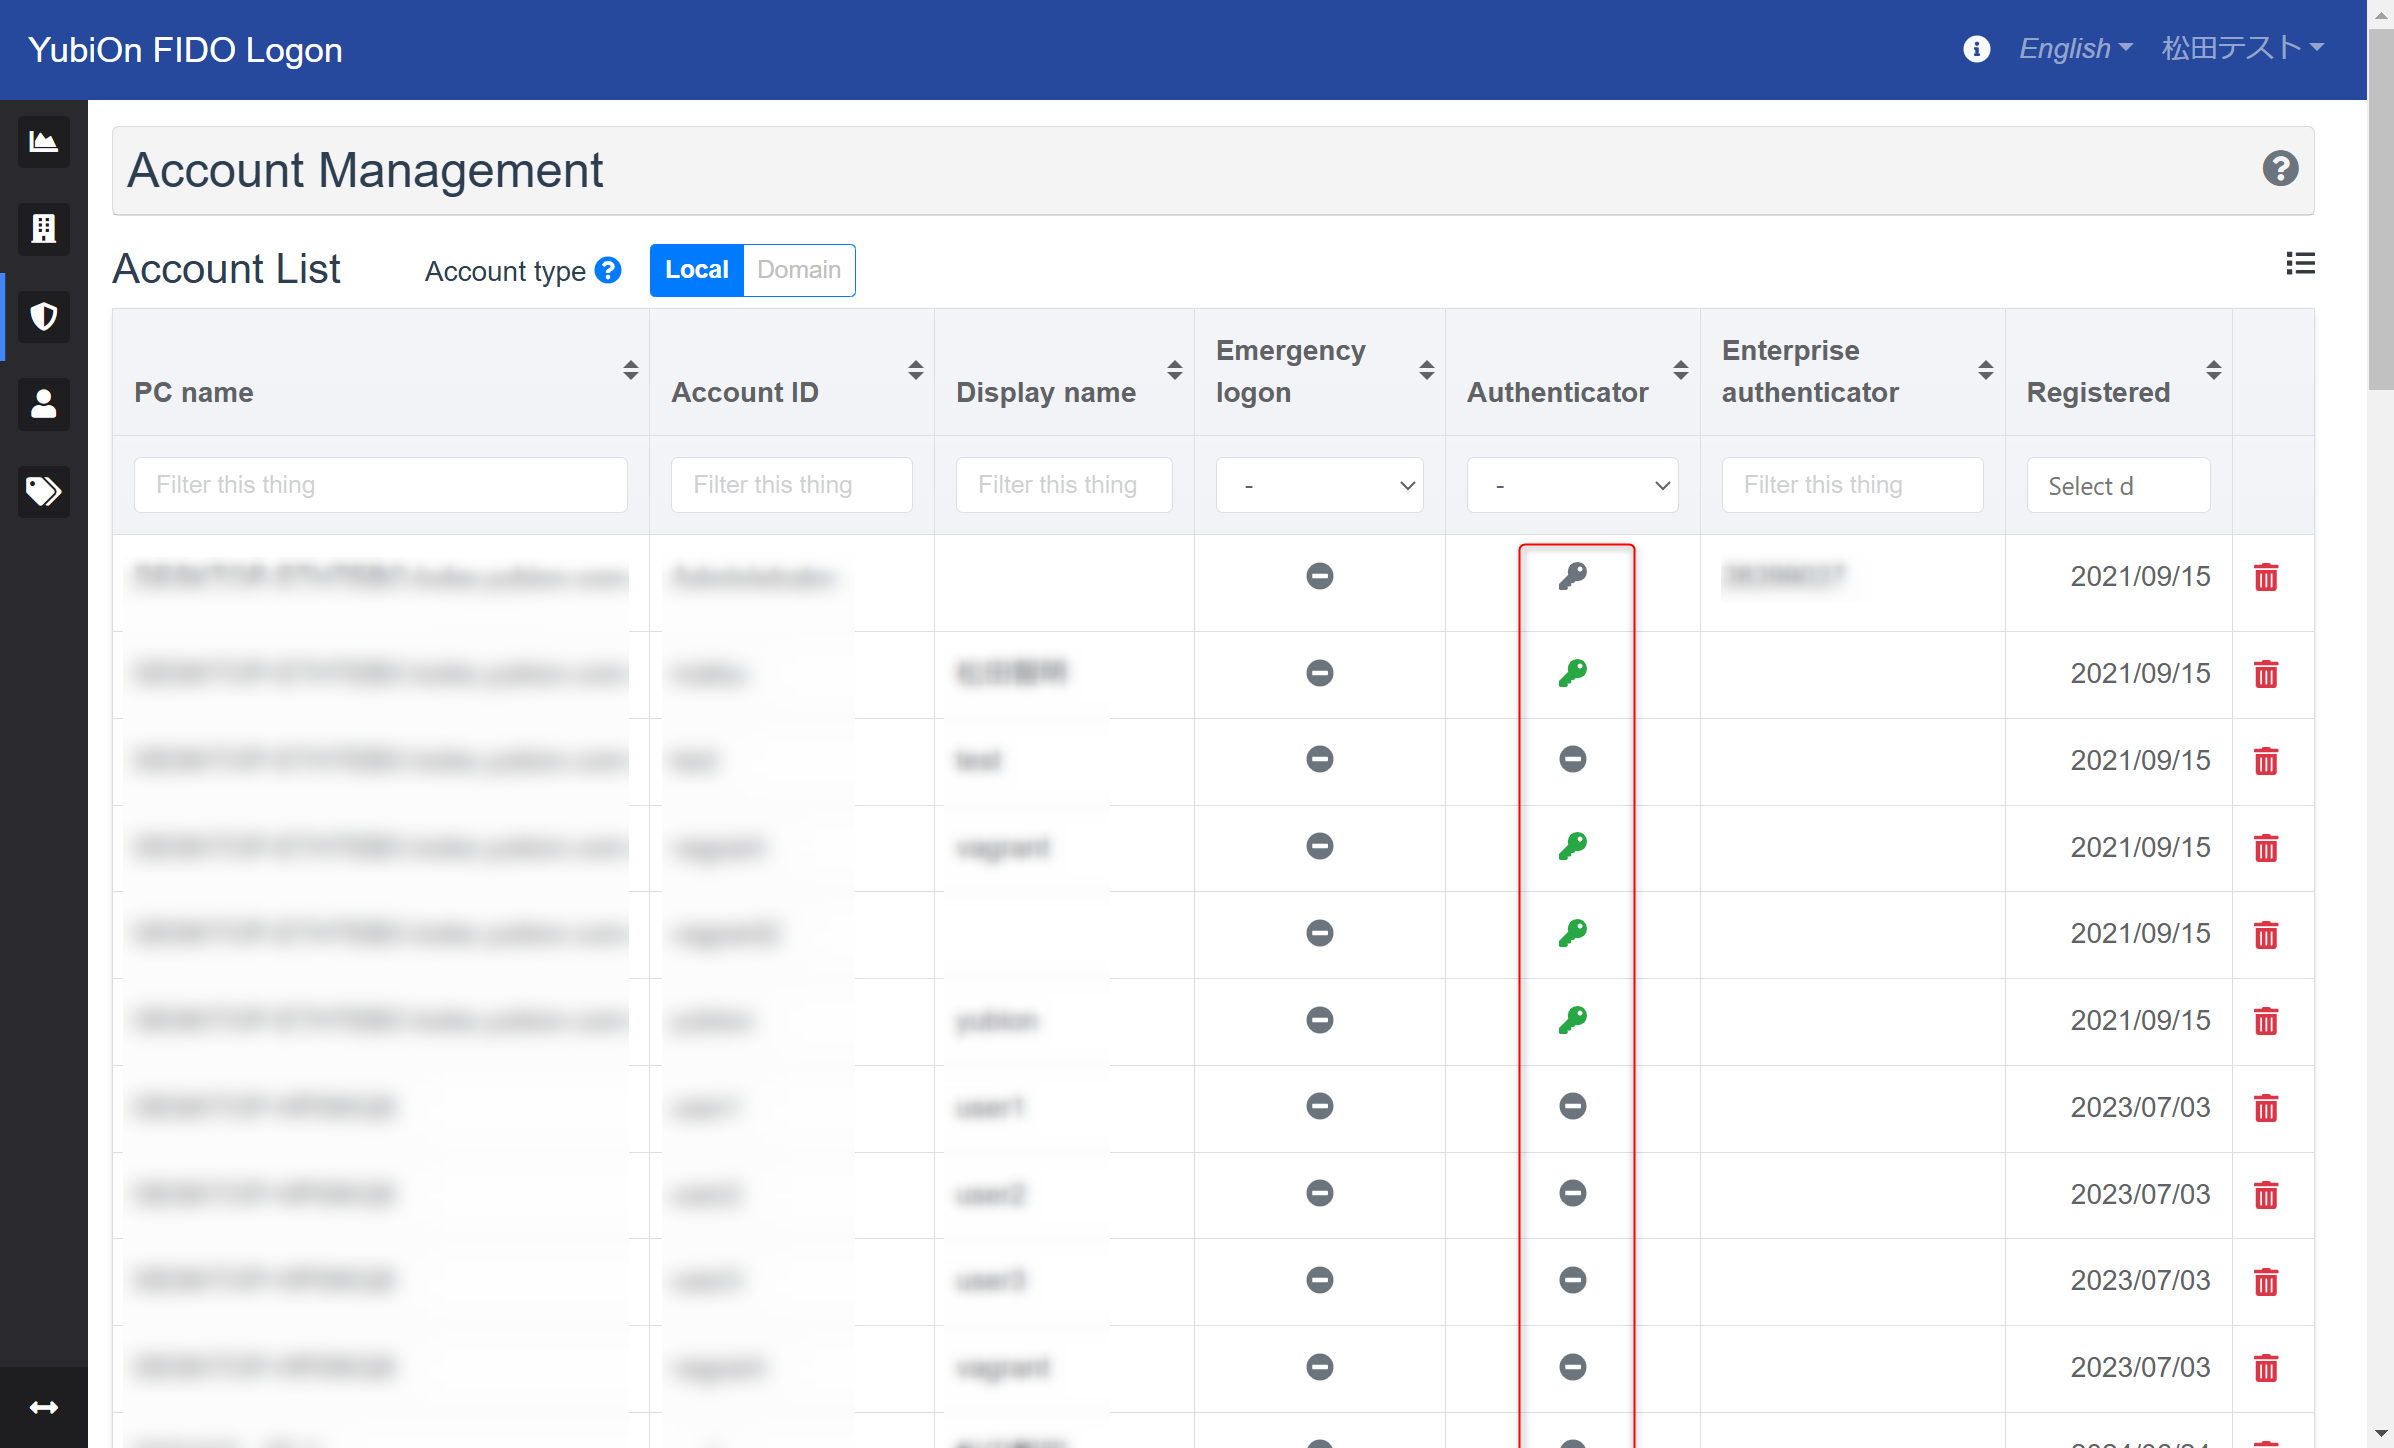
Select Account from the menu.
-
Click the authenticator icon for the account you want to unassign from either the local or domain account.
-
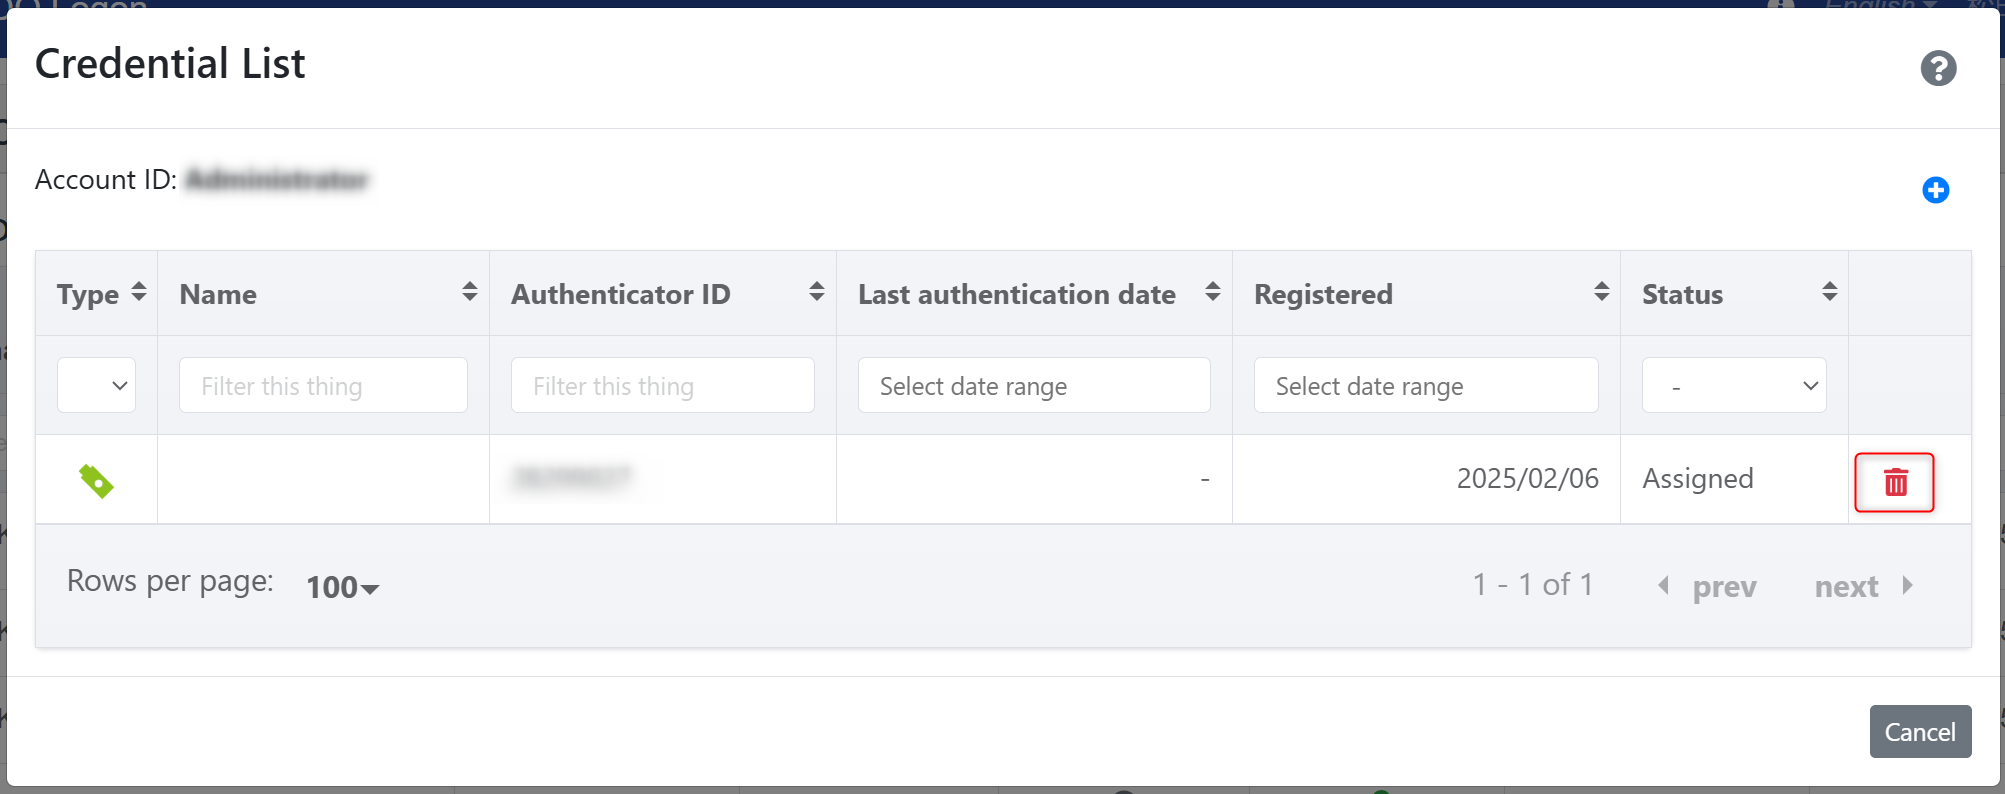
In the credentials list modal, click the delete icon for the authenticator you want to unassign.
-
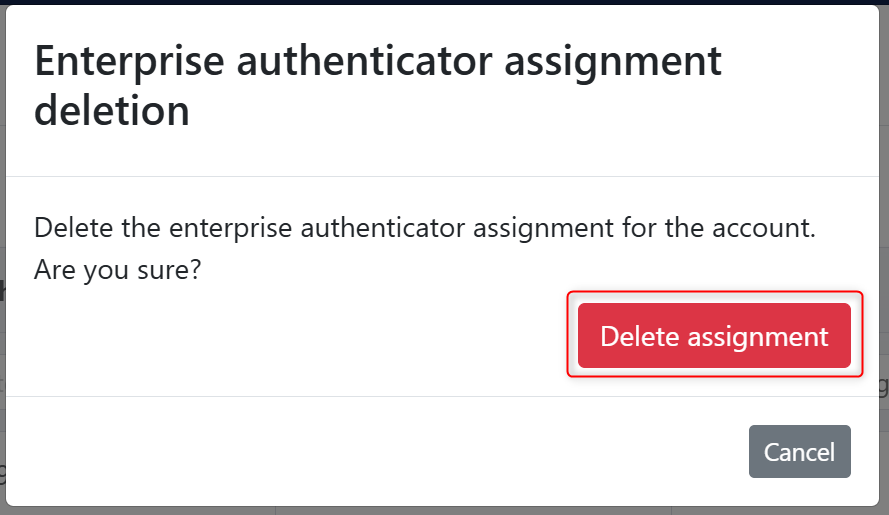
In the confirmation window, click Delete Assignment and then click OK on the confirmation message.
If the authenticator is already registered, a confirmation window will appear asking whether to delete the registered information.
Deleting the registration will make logon impossible. Proceed only if this is acceptable.
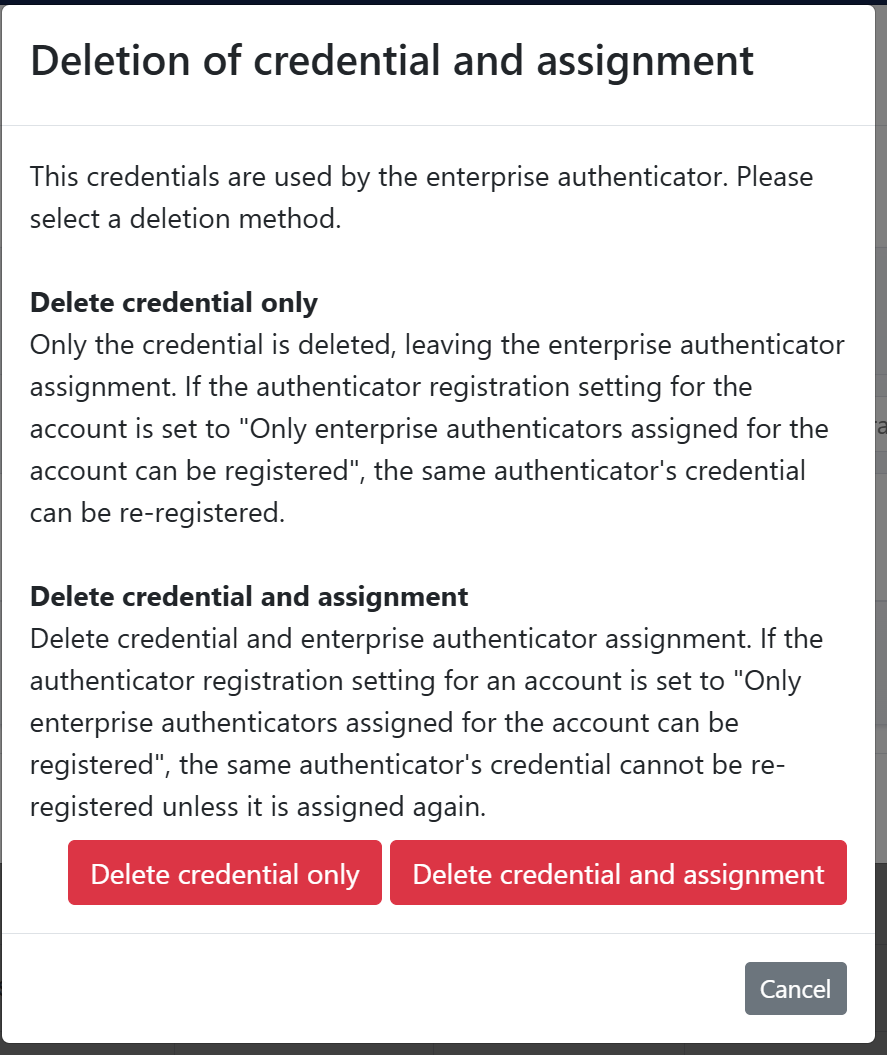
Delete Credentials Only …Deletes only the registered information without removing the assignment.
Delete Credentials and Assignment …Deletes both the registered information and the assignment.
- Once the deletion is successful, a success message will appear, and the information will be removed from the list.
Settings from the Enterprise Authenticator Management Screen
In the Enterprise Authenticator Management Screen, you can unassign accounts associated with a specific enterprise authenticator.
Operation Procedure
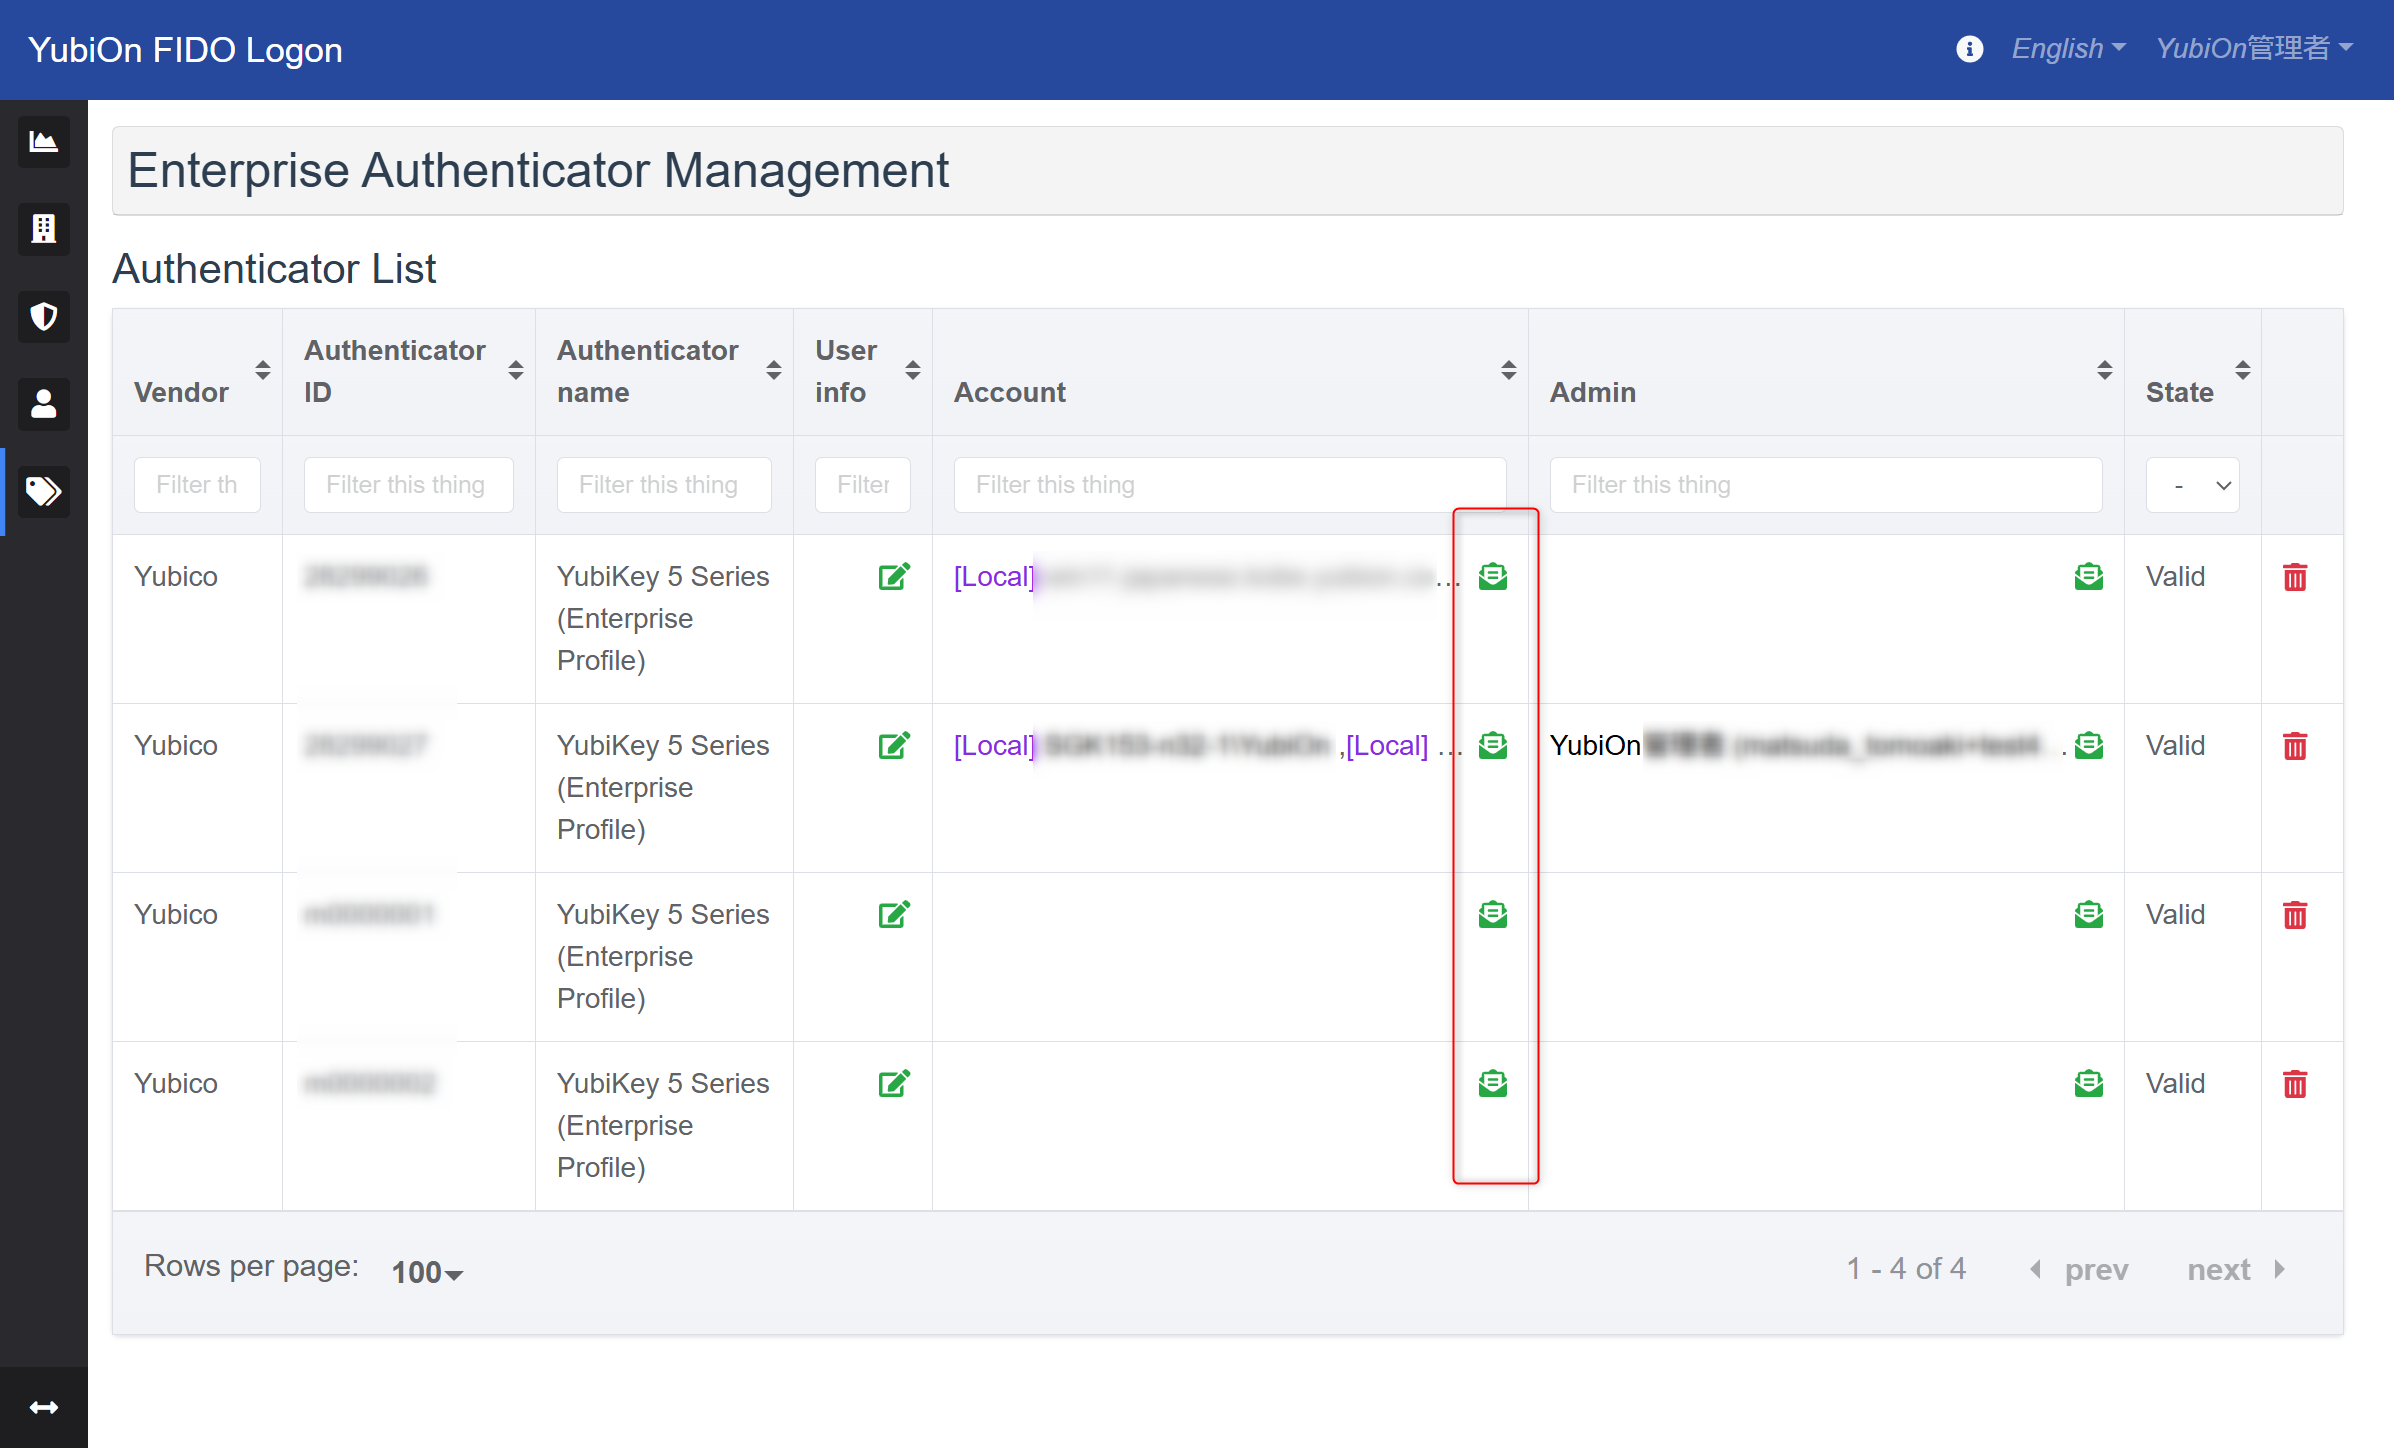
Select Enterprise Authenticator from the menu.
-
Click the account icon for the authenticator you want to unassign.
-
In the enterprise authenticator usage account list modal, click the delete icon for the account you want to unassign.
Confirm by clicking OK in the confirmation message.
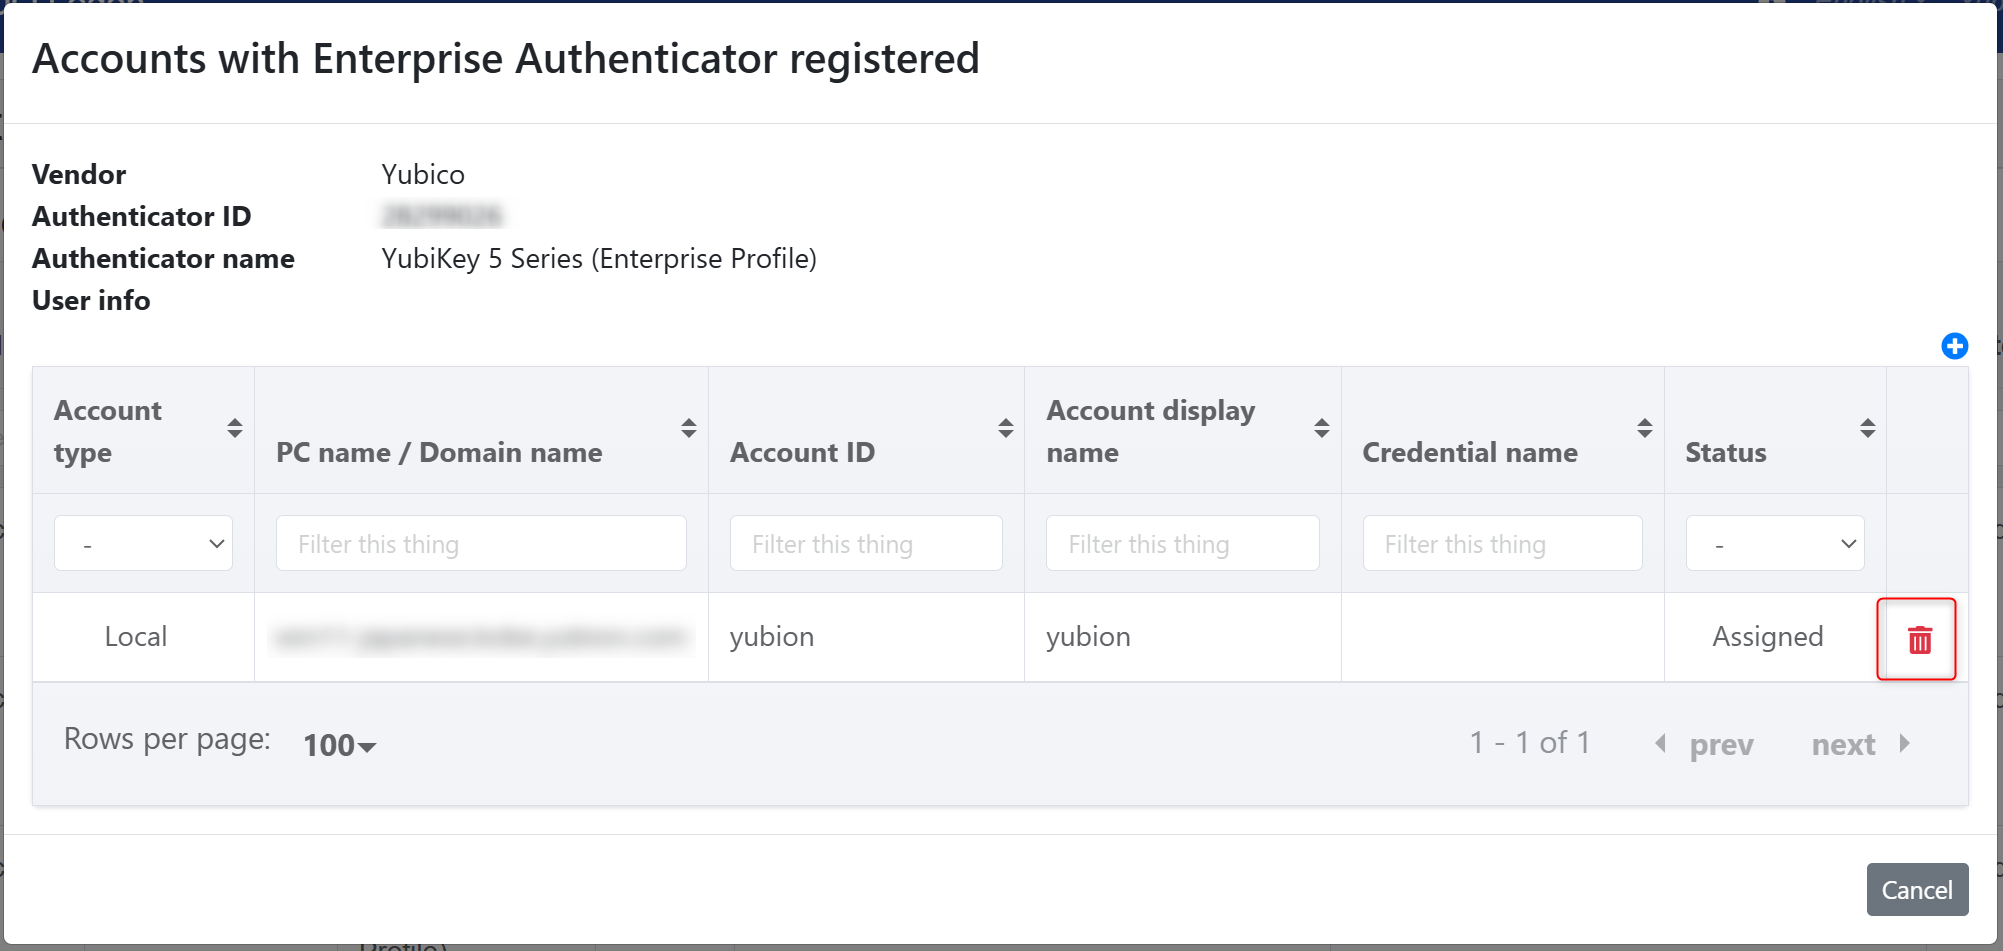
If the authenticator is already registered, both the assignment and registered information will be deleted.
Please note that deleting the registration will prevent logon using that authenticator. -
Once the deletion is successful, a success message will appear, and the information will be removed from the list.