Enterprise Authenticator Management Screen
This screen is displayed only when the Enterprise authenticator management functions is enabled in the customer settings.
This is the screen for managing enterprise authenticators.
The authenticator data listed here cannot be added manually by customers. It is automatically added by the system after applying for and purchasing the enterprise authenticator service.
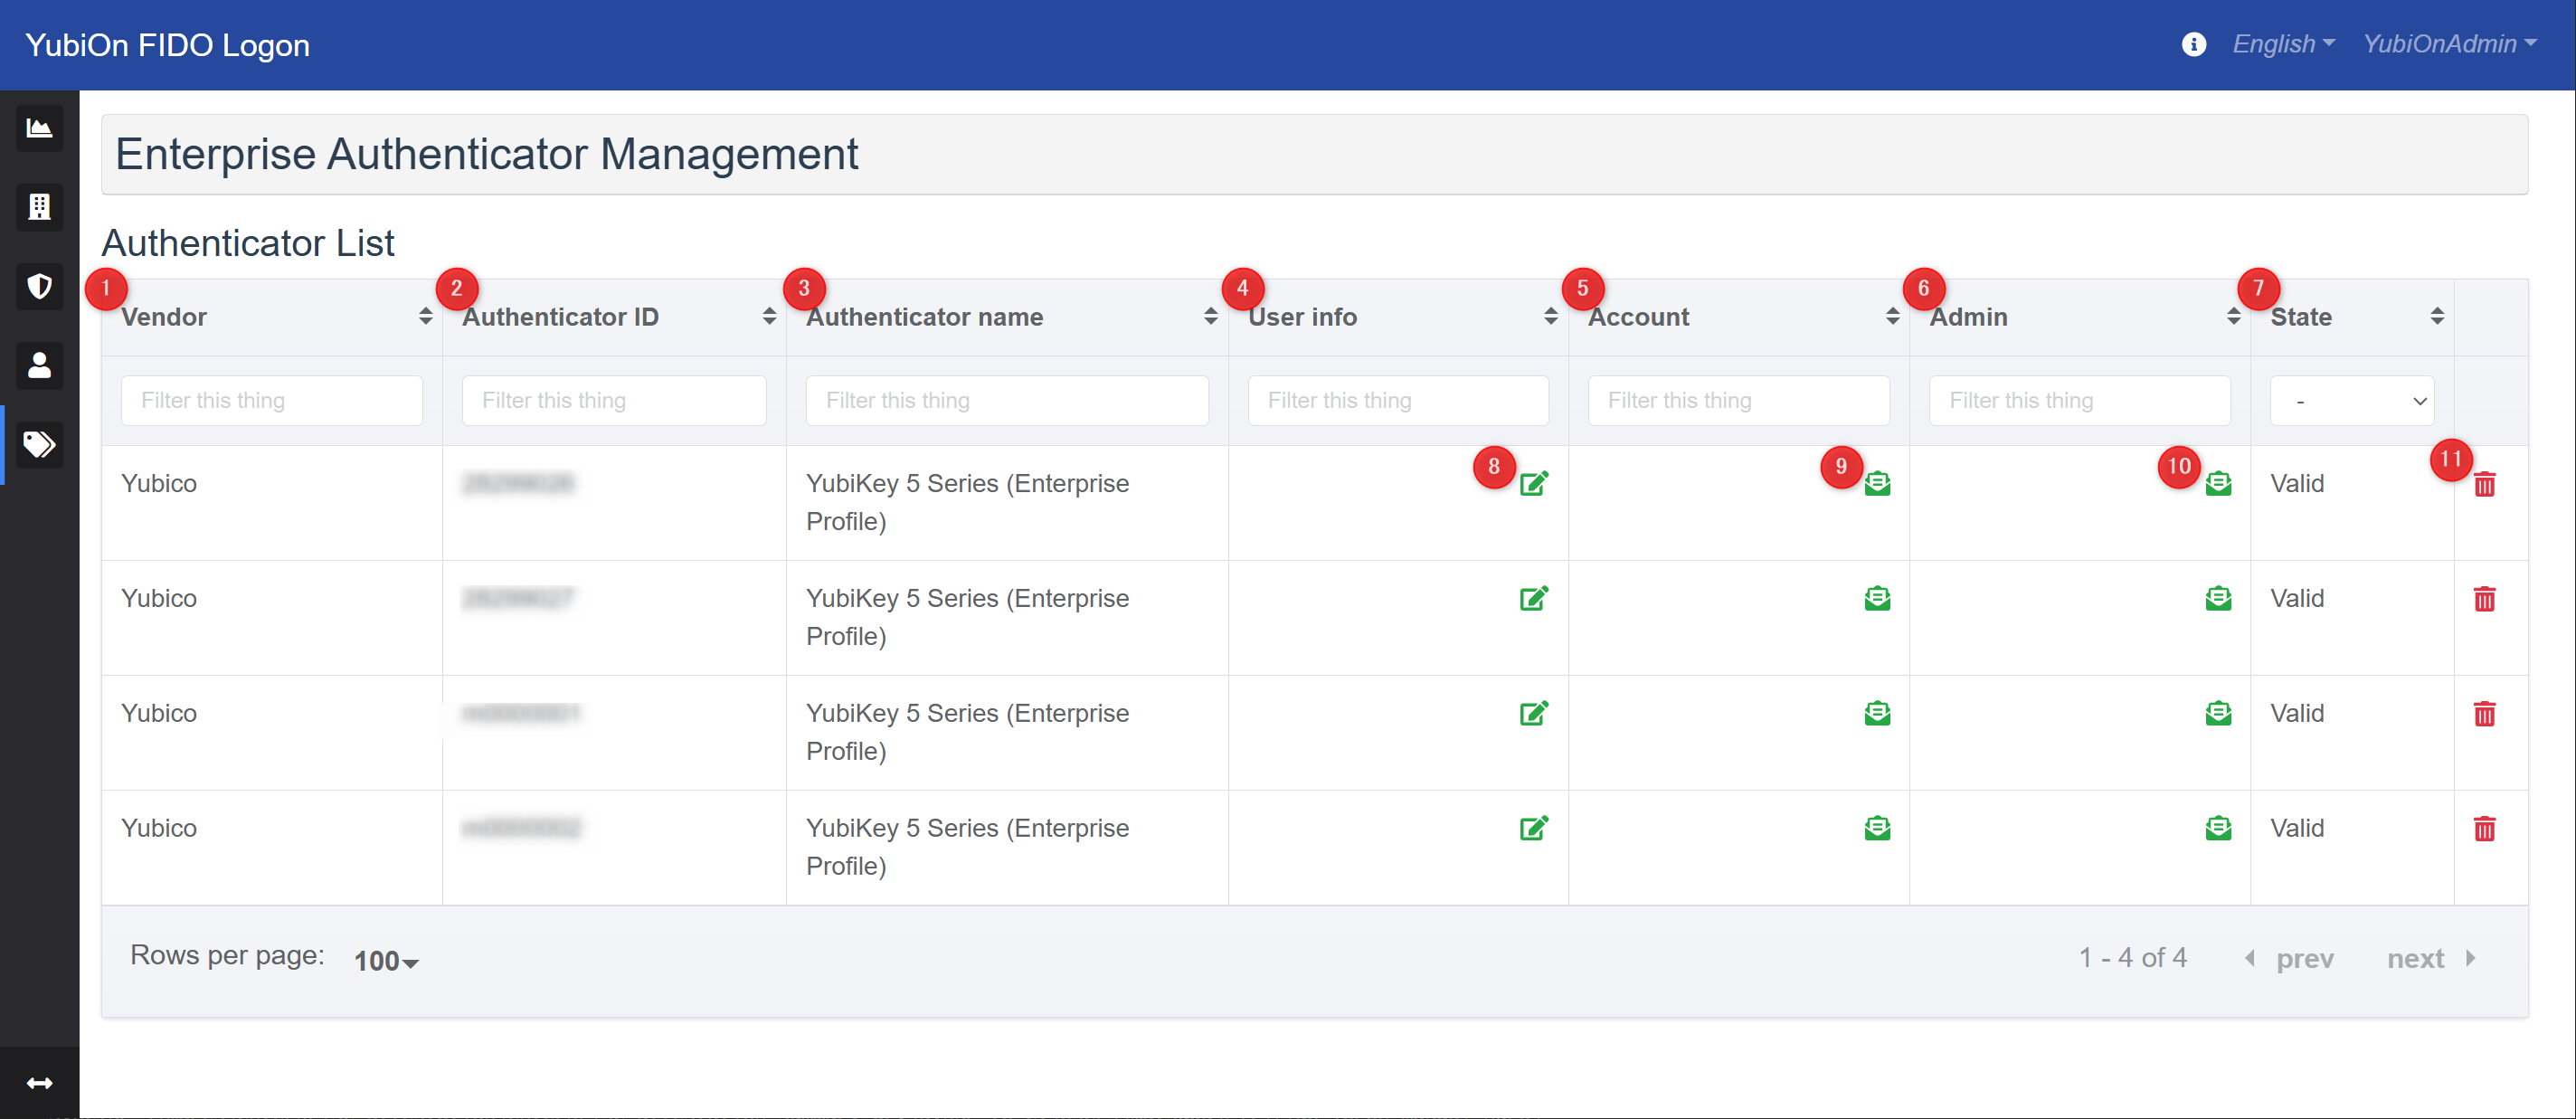
Authenticator List
Displays the information of registered enterprise authenticators.
-
Vendor
Displays the vendor of the authenticator. -
Authenticator ID
Displays the unique identifier of the authenticator. -
Authenticator name
Displays the name assigned to the authenticator. -
User info
Displays information associated with the authenticator. This field is initially blank and only shown on this list.
Customers can freely add, edit, or delete this information as a memo (e.g., owner details). -
Account
Displays the Windows account assigned or registered to the authenticator.
Click the icon to view details and configure account assignments. -
Admin
Displays the administrator registered or assigned for the authenticator on the management website.
Click the icon to view details and configure administrator assignments. -
State
Displays the status of the authenticator.- Active: The authenticator is available for use.
- Disposed: The authenticator is no longer available.
-
Edit User Information Icon
Allows you to edit the information associated with the authenticator. -
Account List Icon
Displays a list of accounts assigned or registered to the authenticator. -
Administrator List Icon
Displays a list of administrators assigned or registered to the authenticator. -
Dispose Authenticator Icon
Dispose the authenticator.
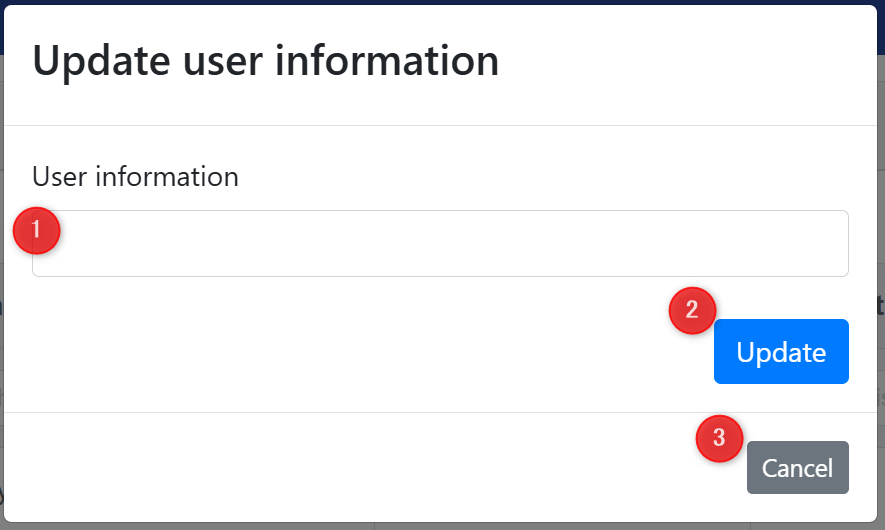
Updating User Information
This modal appears when you click the Edit User Information Icon. It allows you to edit the information associated with the authenticator.
-
User Information
Enter owner information. -
Update Button
Updates the information with the entered content. -
Cancel Button
Returns without updating the information.
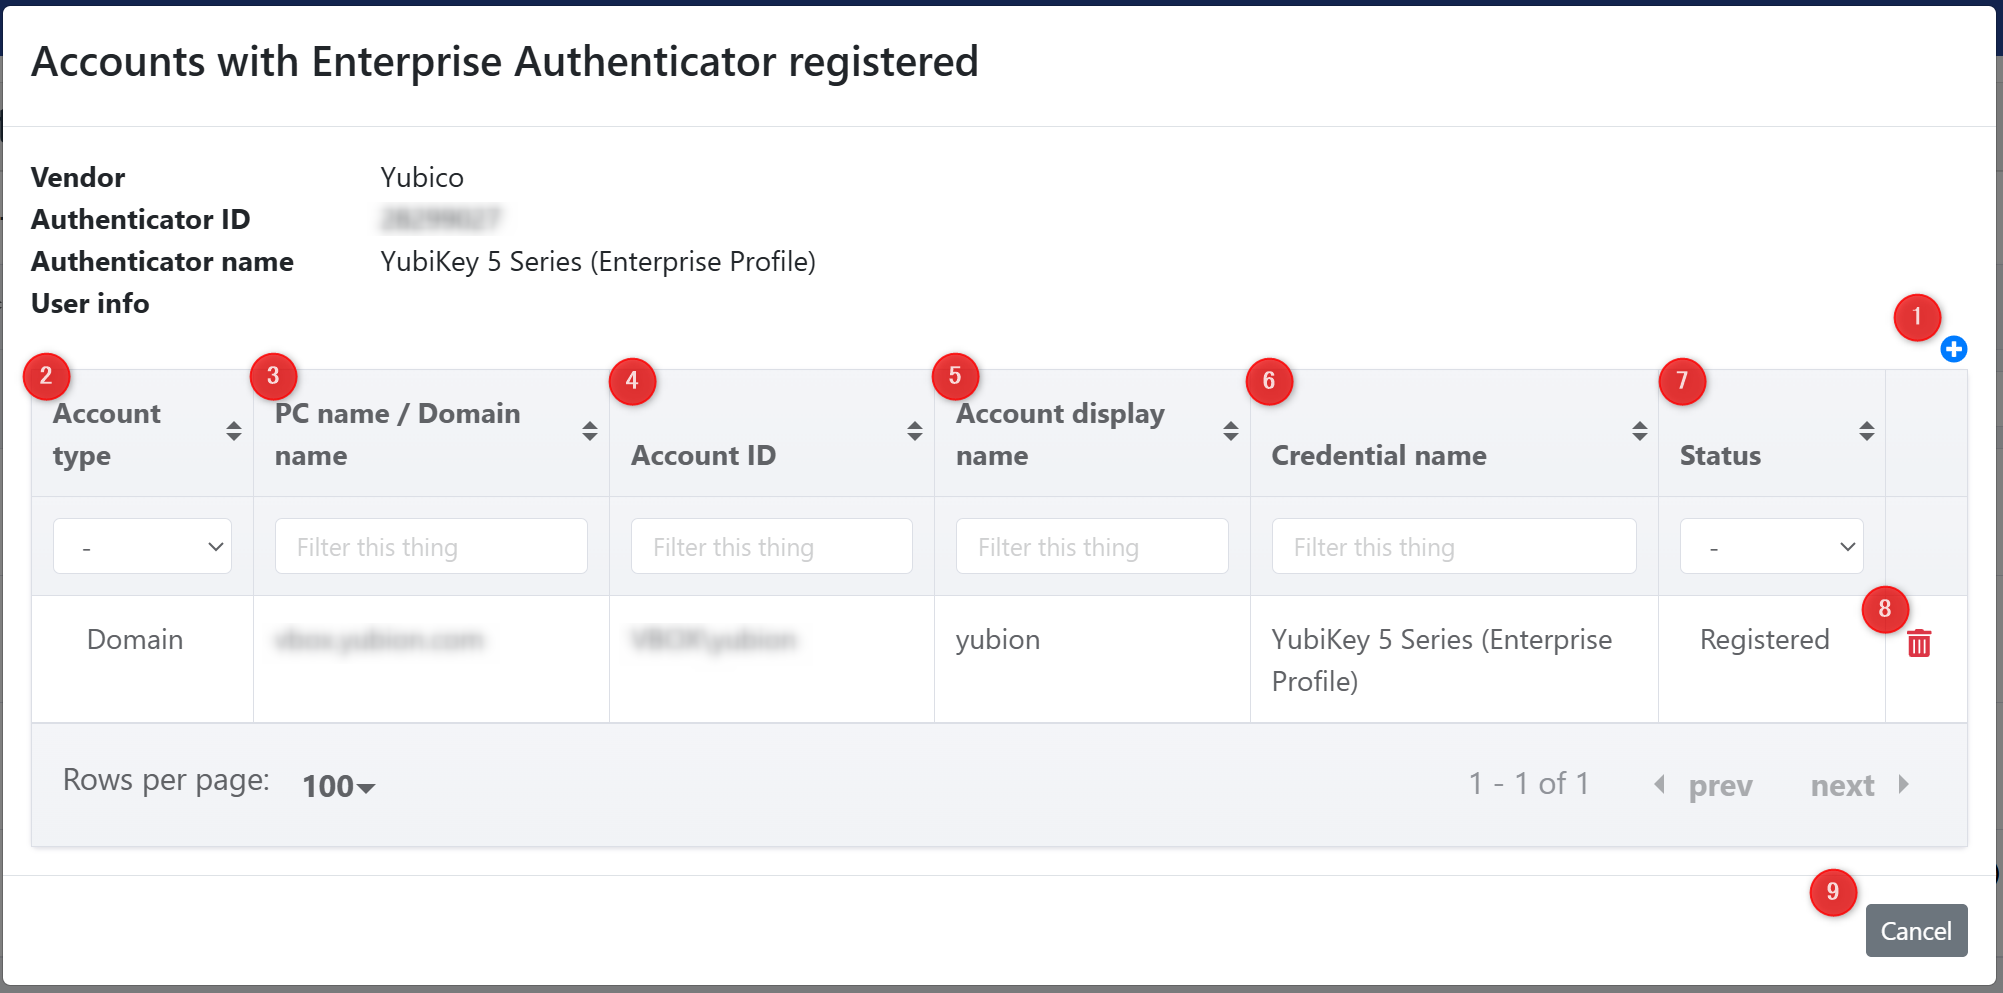
Accounts with Enterprise Authenticator registered
This modal appears when you click the Account List Icon. It displays the assignment and registration status of accounts for the selected authenticator. You can add or remove account assignments.
-
Add Icon
Opens a modal to assign an authenticator to an account. -
Account type
Displays the type of account.- Local: Local account
- Domain: Domain account
-
PC name / Domain name
Displays the PC name for local accounts or the domain name for domain accounts. -
Account ID
Displays the account ID. -
Account display name
Displays the account’s display name. -
Credential name
Displays the name of the authenticator. -
Status
Displays the status.- Assigned Only: The authenticator is assigned on the management website but not yet registered.
- Registered: The authenticator has been registered successfully.
-
Delete Icon
Removes the account assignment. If the account has registered the authenticator, it also removes the registration. -
Cancel Button
Closes the modal.
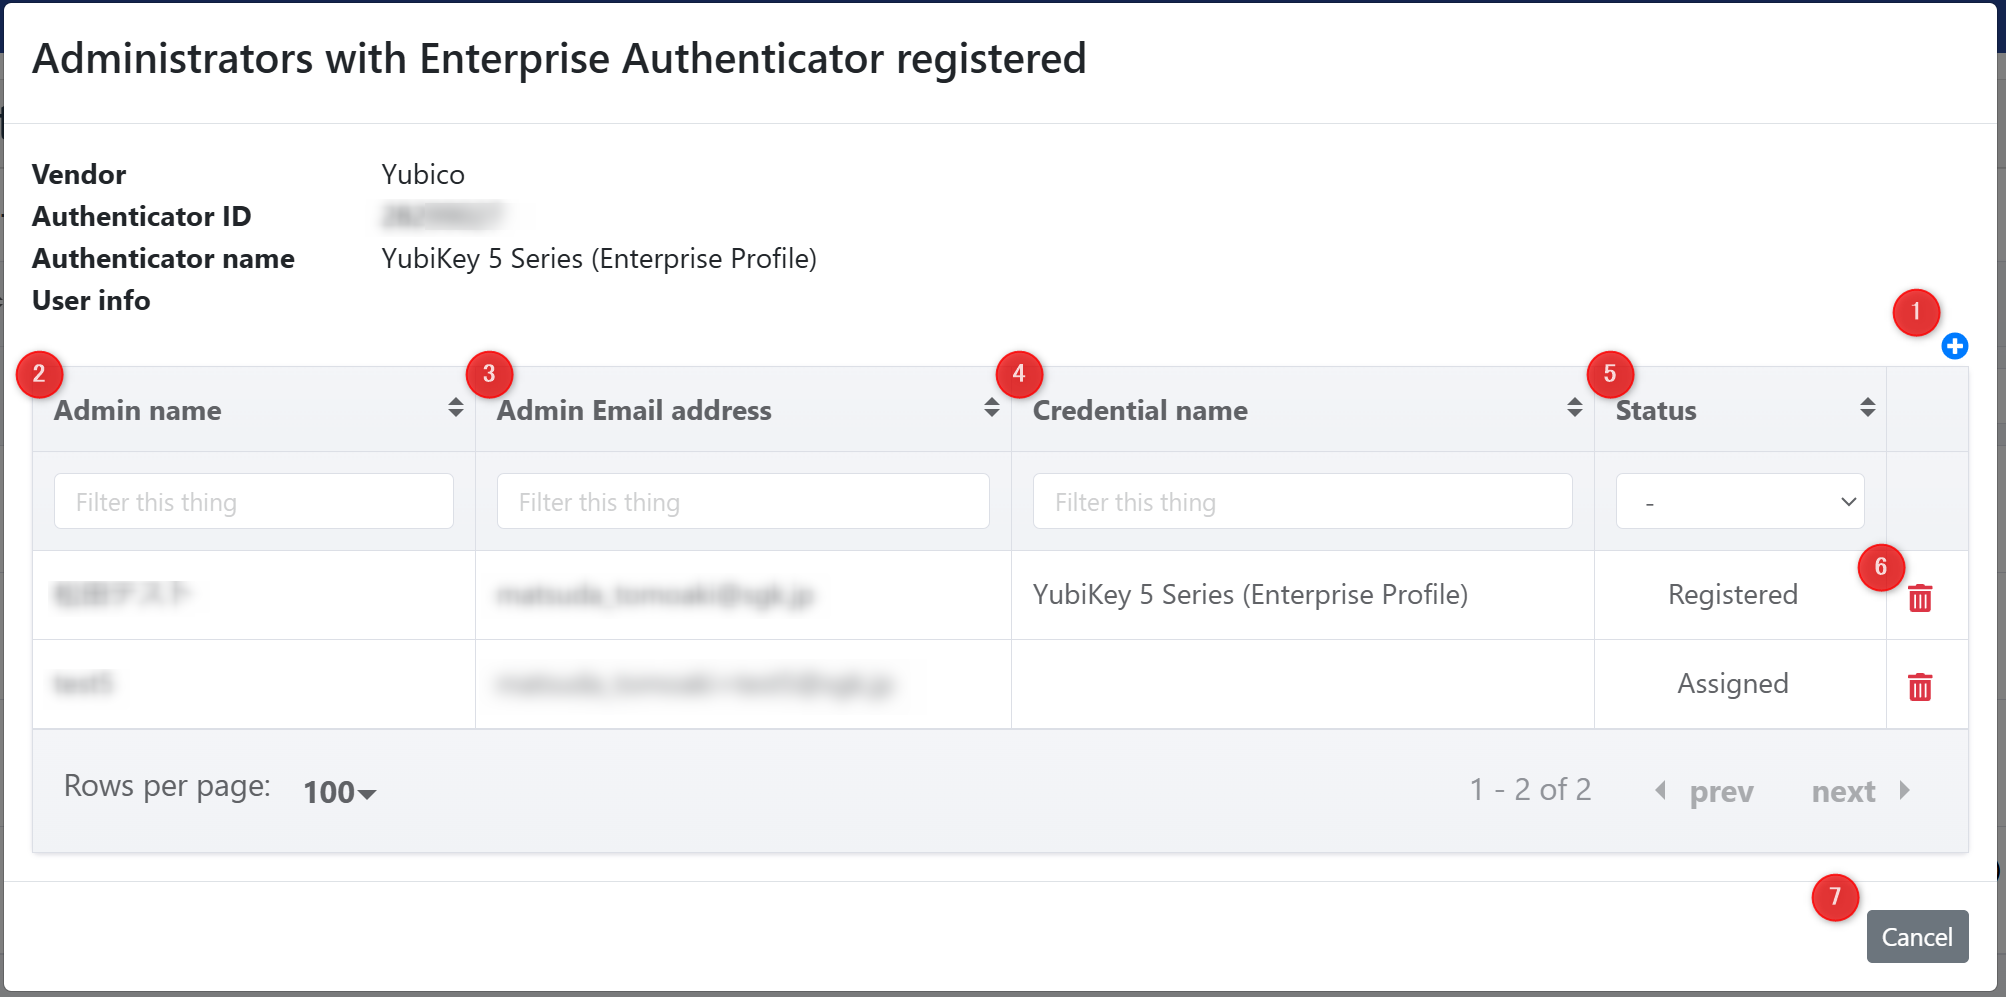
Administrators with Enterprise Authenticator registered
This modal appears when you click the Administrator List Icon. It displays the assignment and registration status of administrators for the selected authenticator. You can add or remove administrator assignments.
-
Add Icon
Opens a modal to assign an authenticator to an administrator. -
Admin name
Displays the name of the administrator. -
Admin Email Address
Displays the email address of the administrator. -
Credential name
Displays the name of the authenticator. -
Status
Displays the status.- Assigned Only: The authenticator is assigned on the management website but not yet registered.
- Registered: The authenticator has been registered successfully.
-
Delete Icon
Removes the administrator assignment. If the administrator has registered the authenticator, it also removes the registration. -
Cancel Button
Closes the modal.