Assign accounts and authenticators
This manual describes how to configure settings for assigning enterprise authenticators to Windows accounts.
This configuration procedure should be followed when the “Only enterprise authenticators assigned for the account can be registered” setting is enabled in the Enterprise Authenticator Management Settings of the management web site.
If “Only enterprise authenticators can be registered” or “All FIDO authenticators can be registered” is set, this configuration is unnecessary.
About Enterprise Authenticator Assignment
The purpose of assigning enterprise authenticators is to allow administrators to specify which authenticators can be used with an account.
Assigned authenticators will be available for the end user to register.
Authenticators that are not assigned cannot be registered.
How to Configure Authenticator Assignment
You can assign an account and an enterprise authenticator through either the Account Management screen or the Enterprise Authenticator Management screen.
Account Management Screen … Assign an authenticator to an account
Enterprise Authenticator Screen … Assign an account to an authenticator
Setting from the Account Management Screen
In the Account Management screen, you can assign enterprise authenticators to accounts.
There are two assignment methods: selecting a single account to assign an authenticator or using a CSV file for batch assignment.
Note: Batch assignment via CSV is only available for domain accounts.
Operation Procedure
Assign to One Account
Select Account from the menu.
-
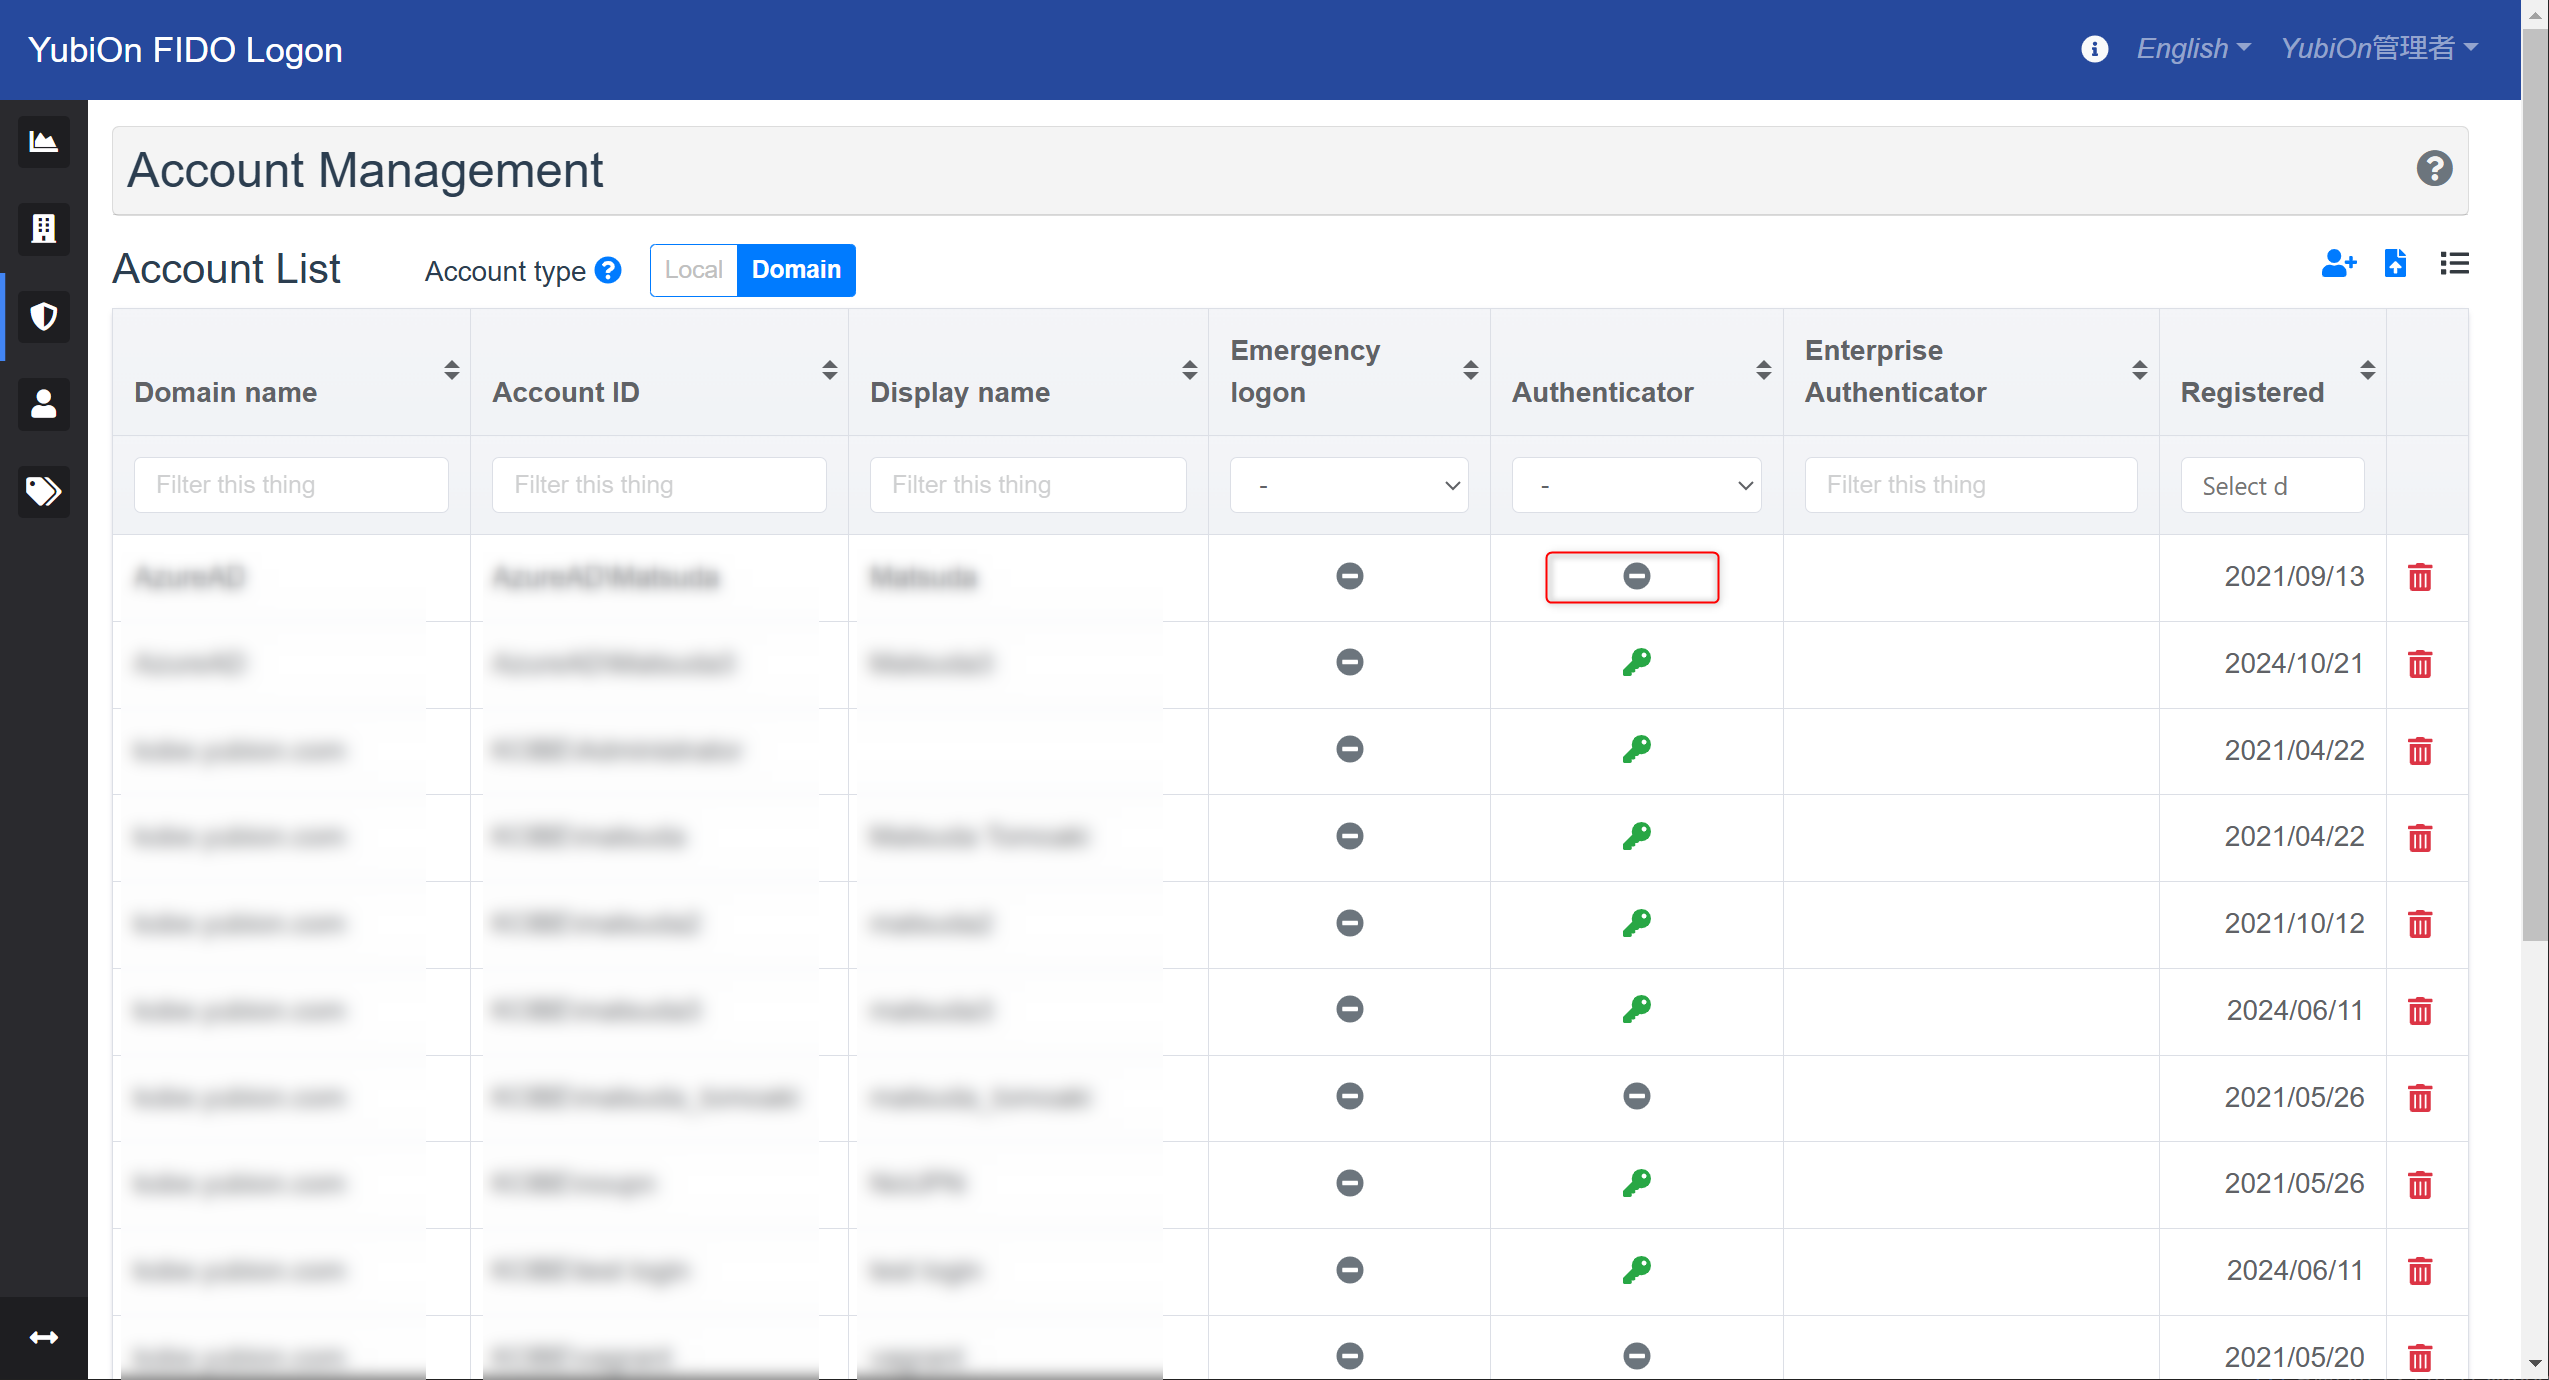
Click the authenticator icon for the local or domain account you want to assign.
-
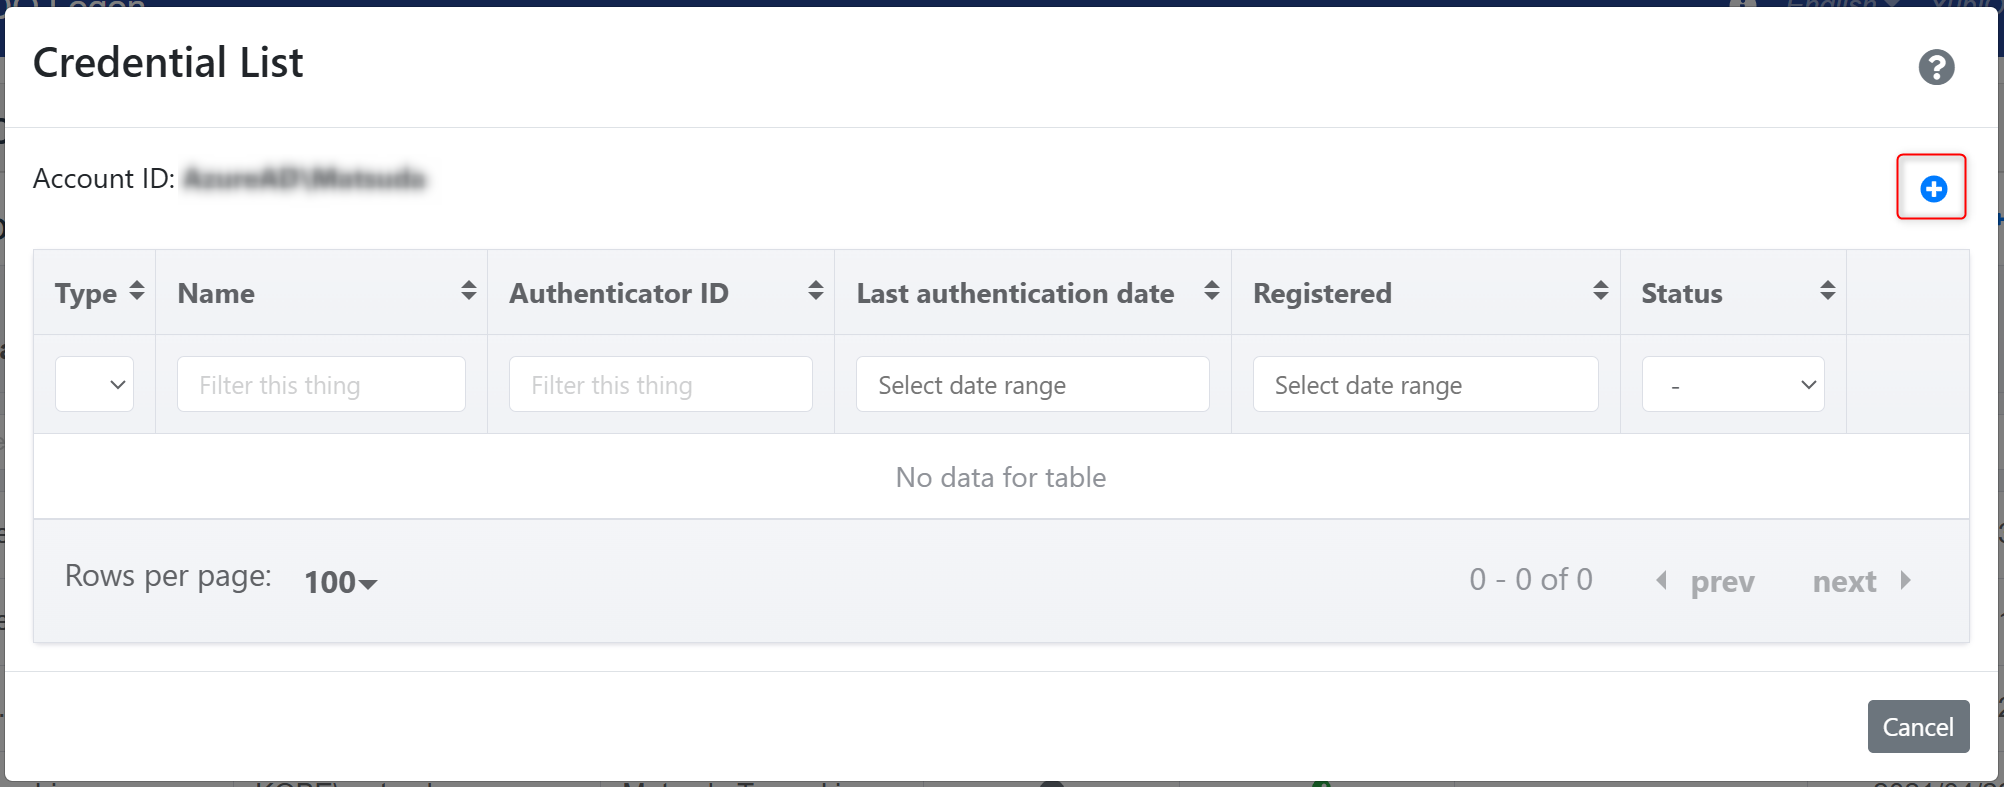
In the authentication information modal, click the add icon at the top right.
-
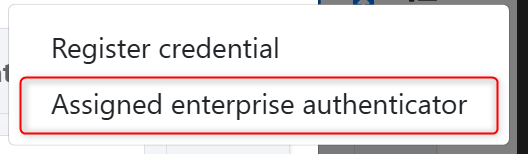
Click Assigned enterprise authenticator.
-
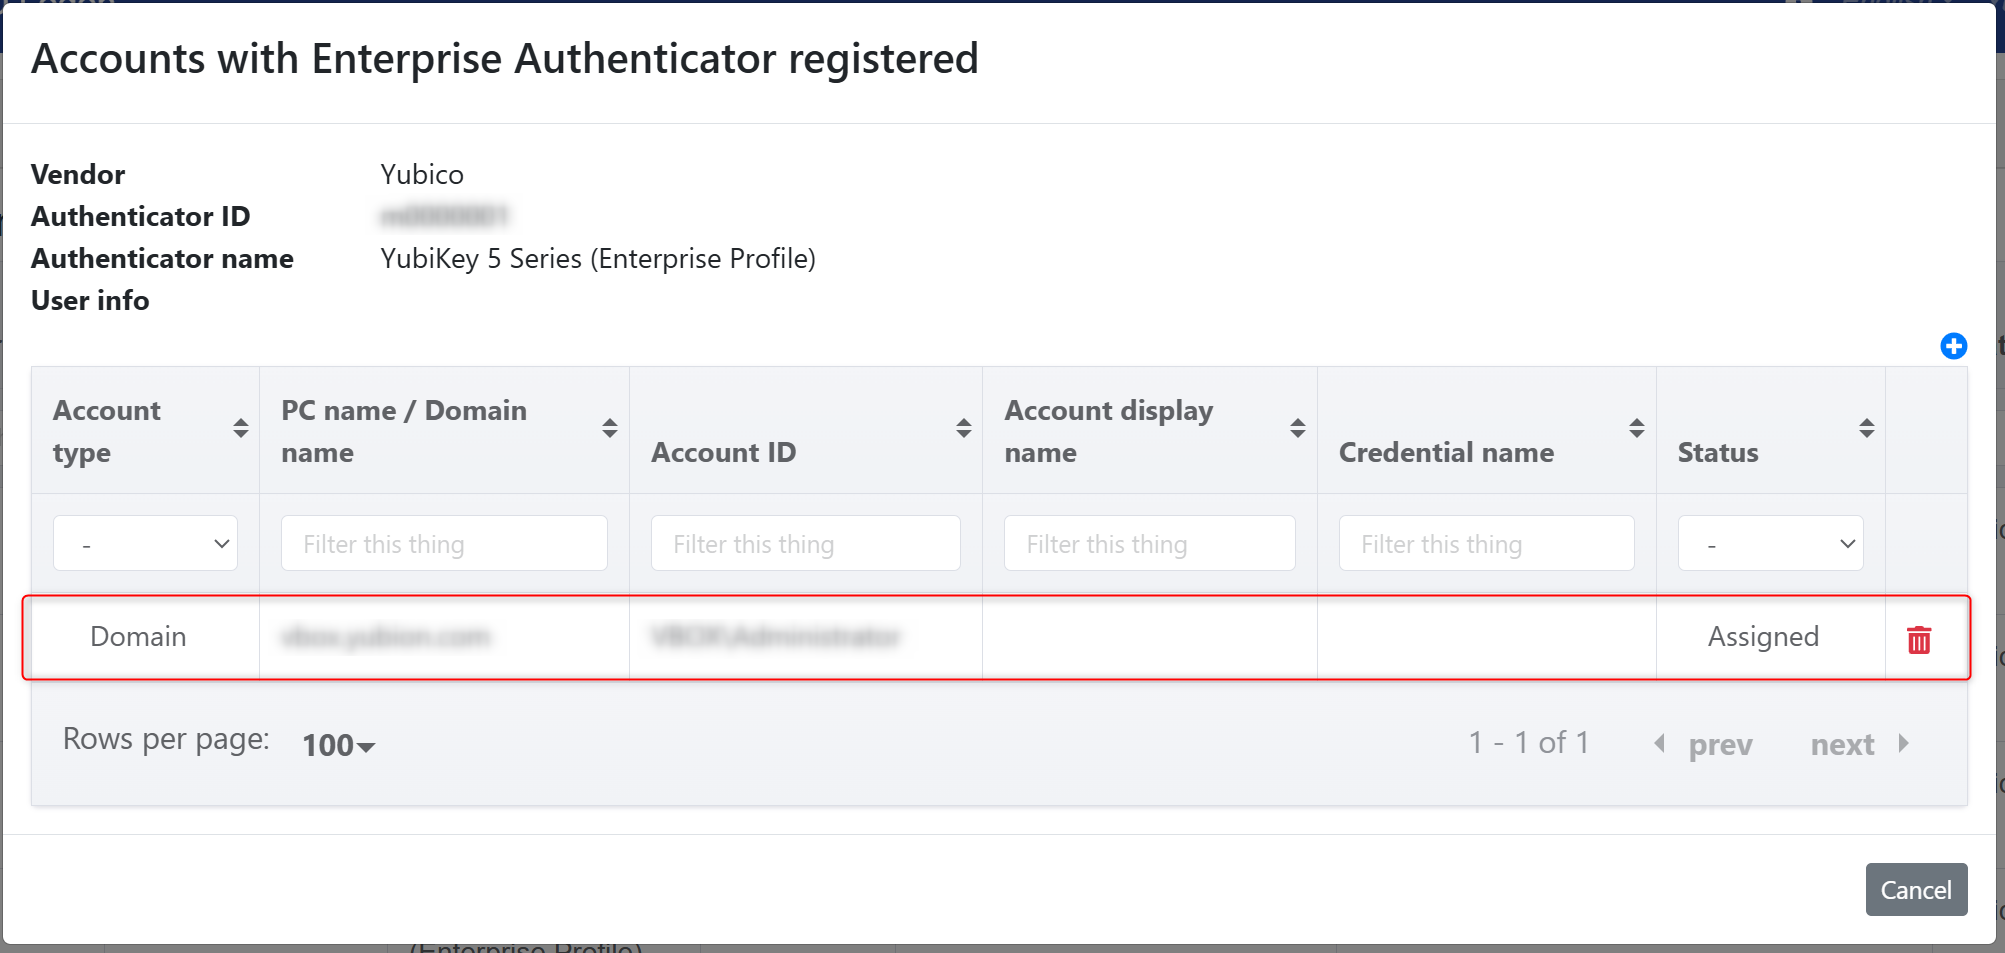
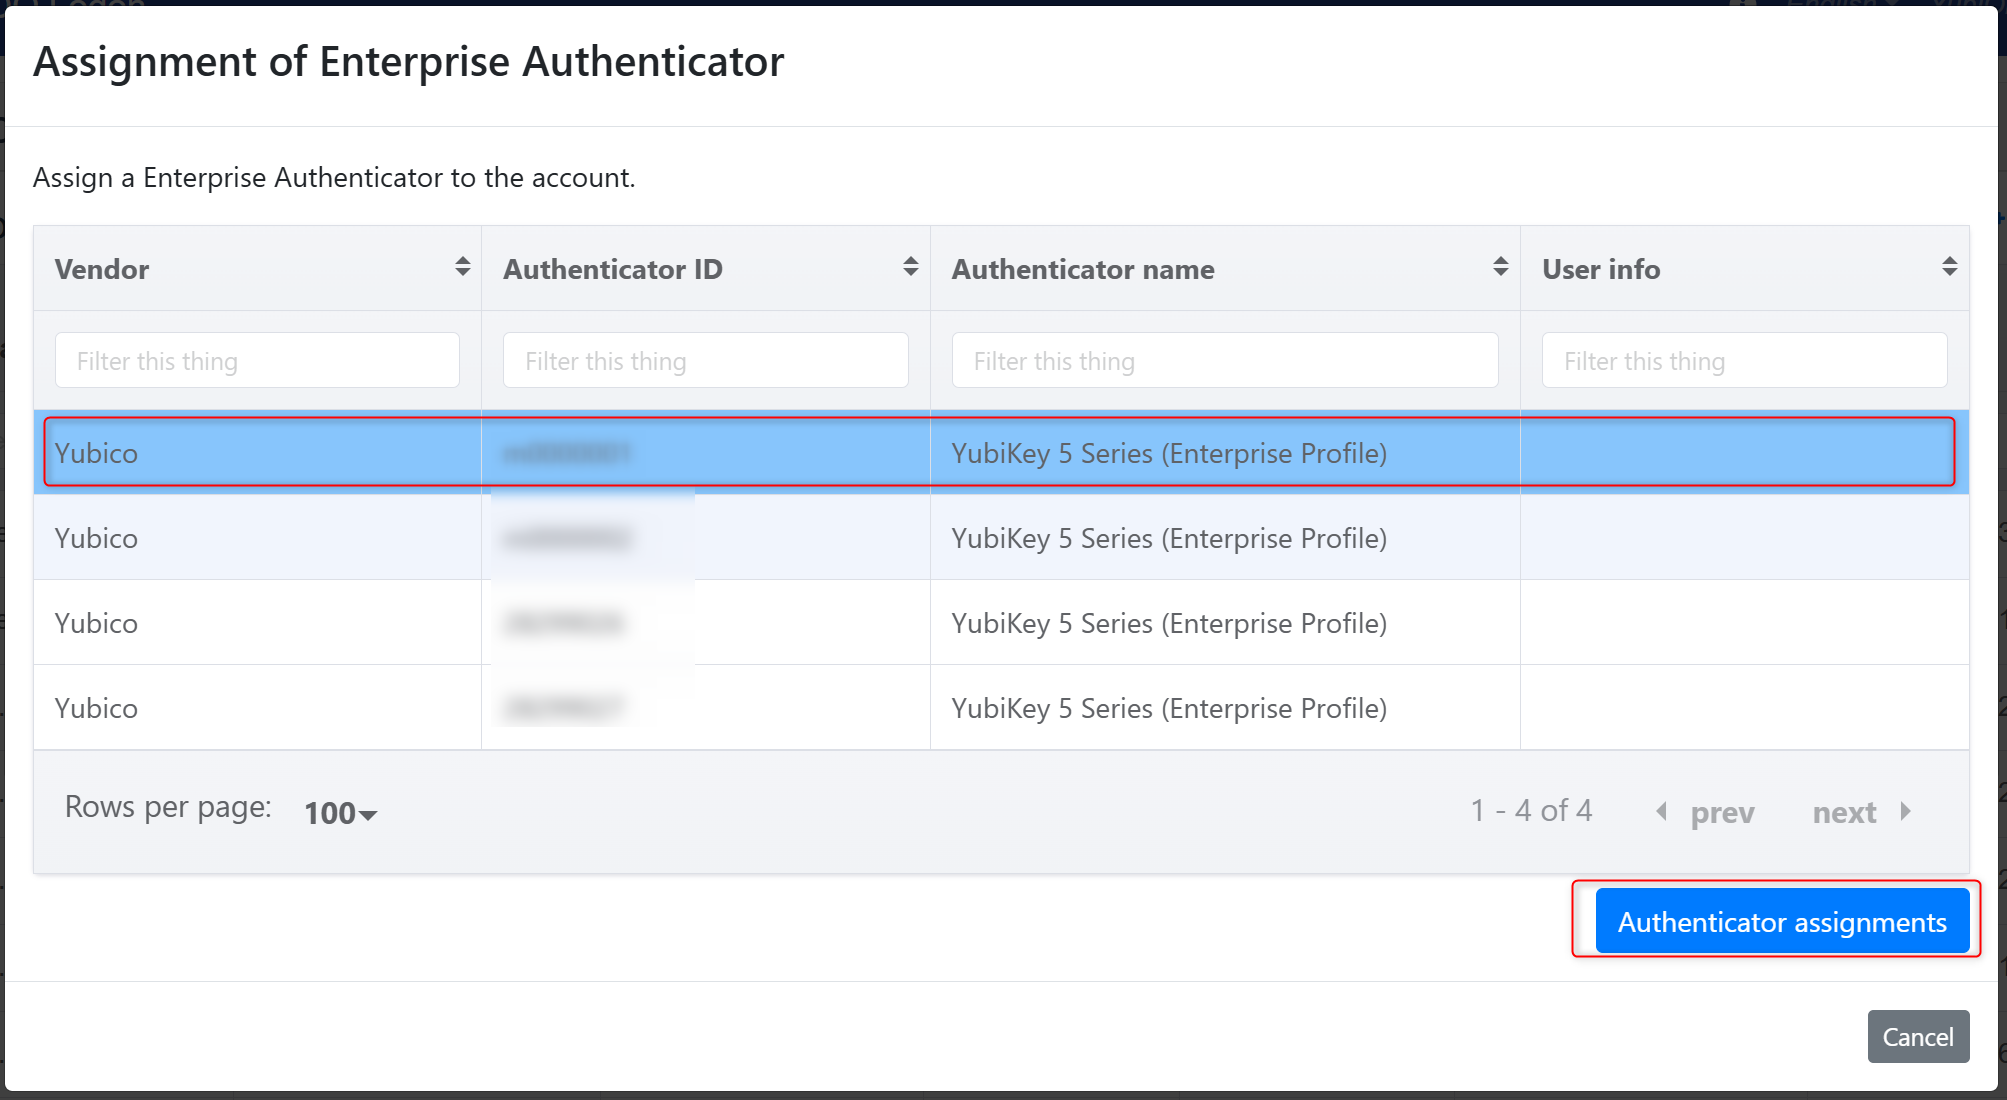
In the Assignment of Enterprise Authenticator modal, select the authenticator you want to assign and click the Authenticator assignments button.
Confirm by clicking OK in the message prompt.
-
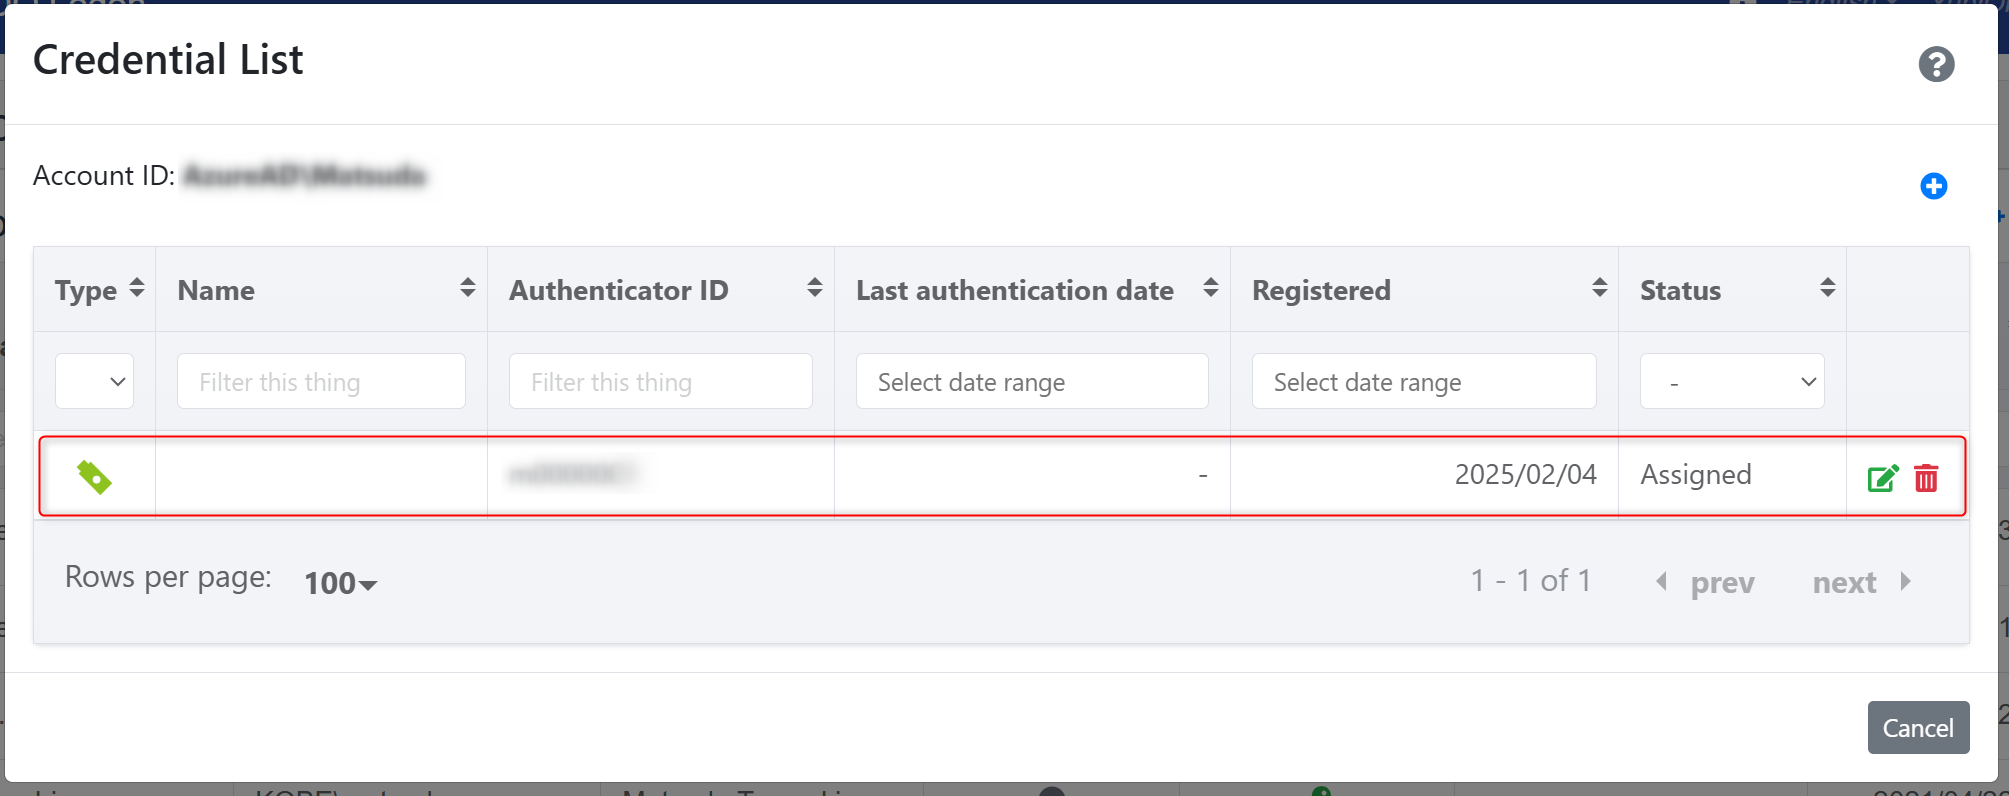
If the assignment is successful, the assigned authenticator will appear in the authentication information list.
Initially, the status will be displayed as Assigned until the actual registration is completed.
The authenticator ID will also be displayed in the Enterprise Authenticator column of the account list.
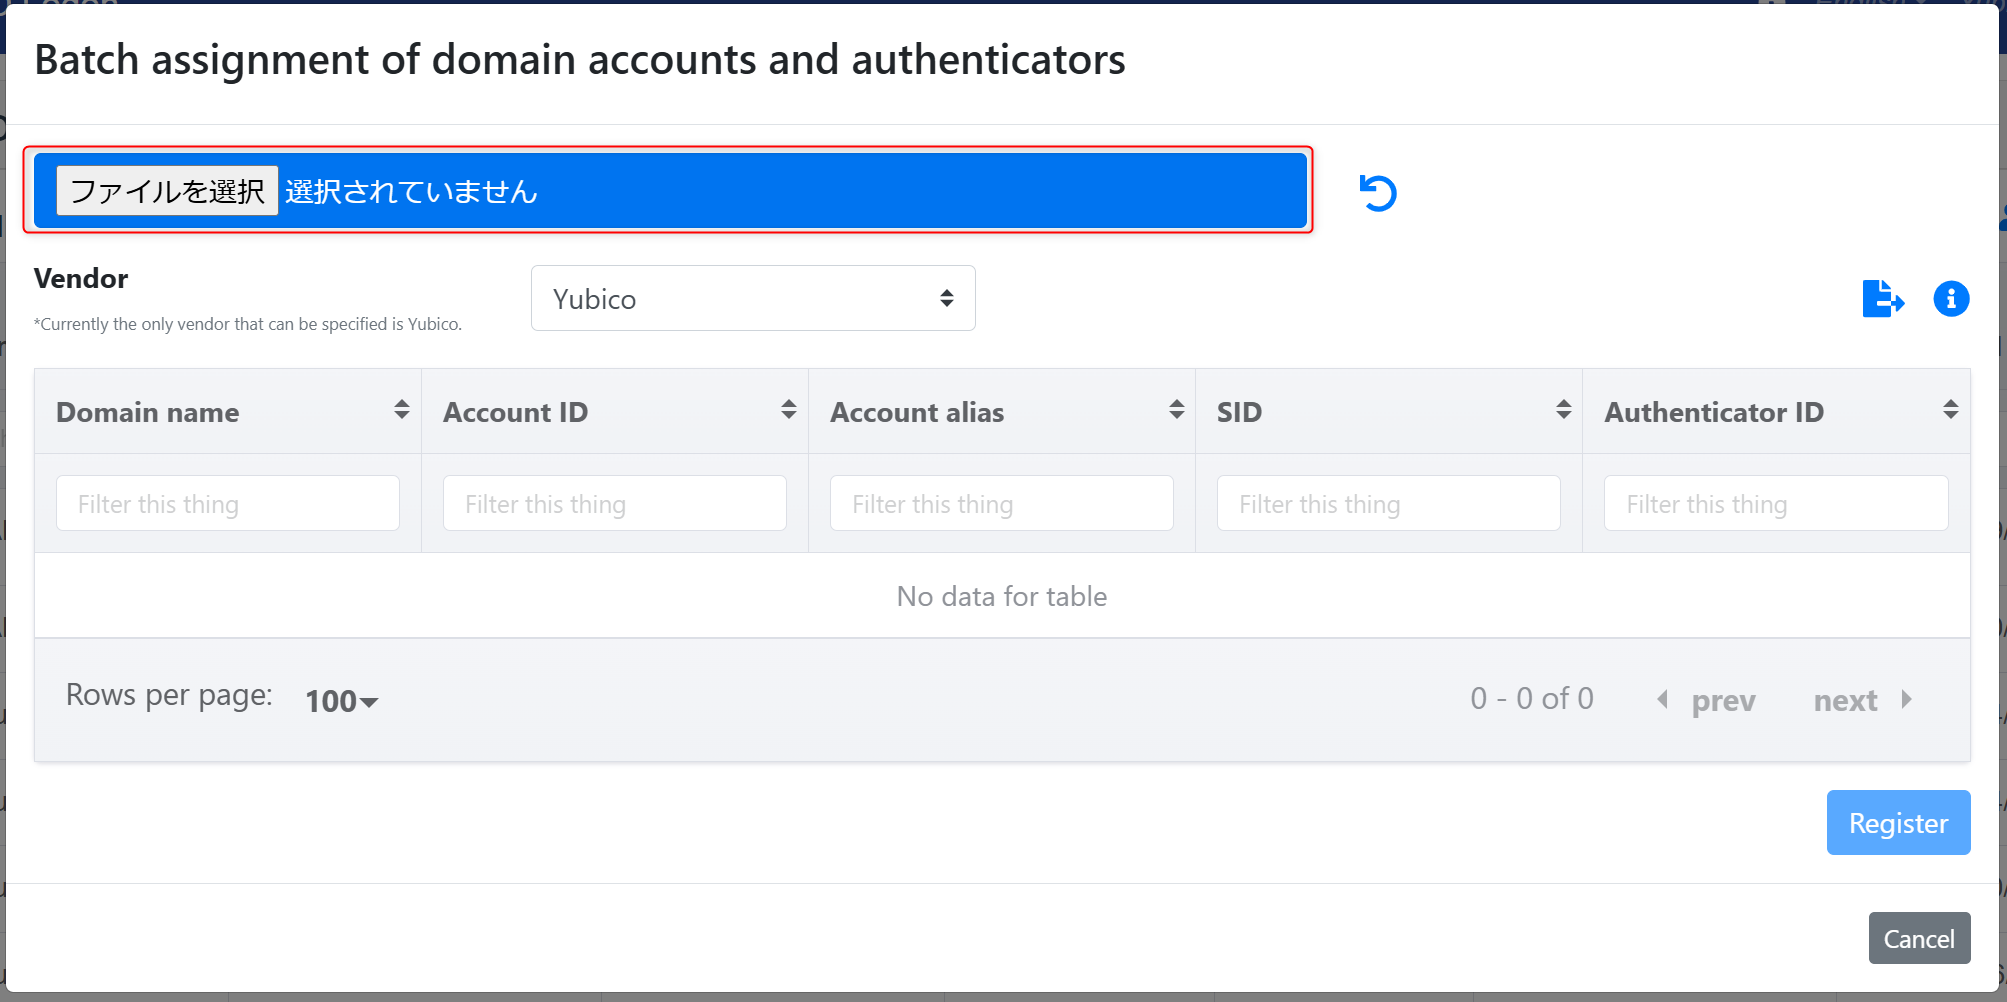
Batch Assignment Using a CSV File
Select Account from the menu.
-
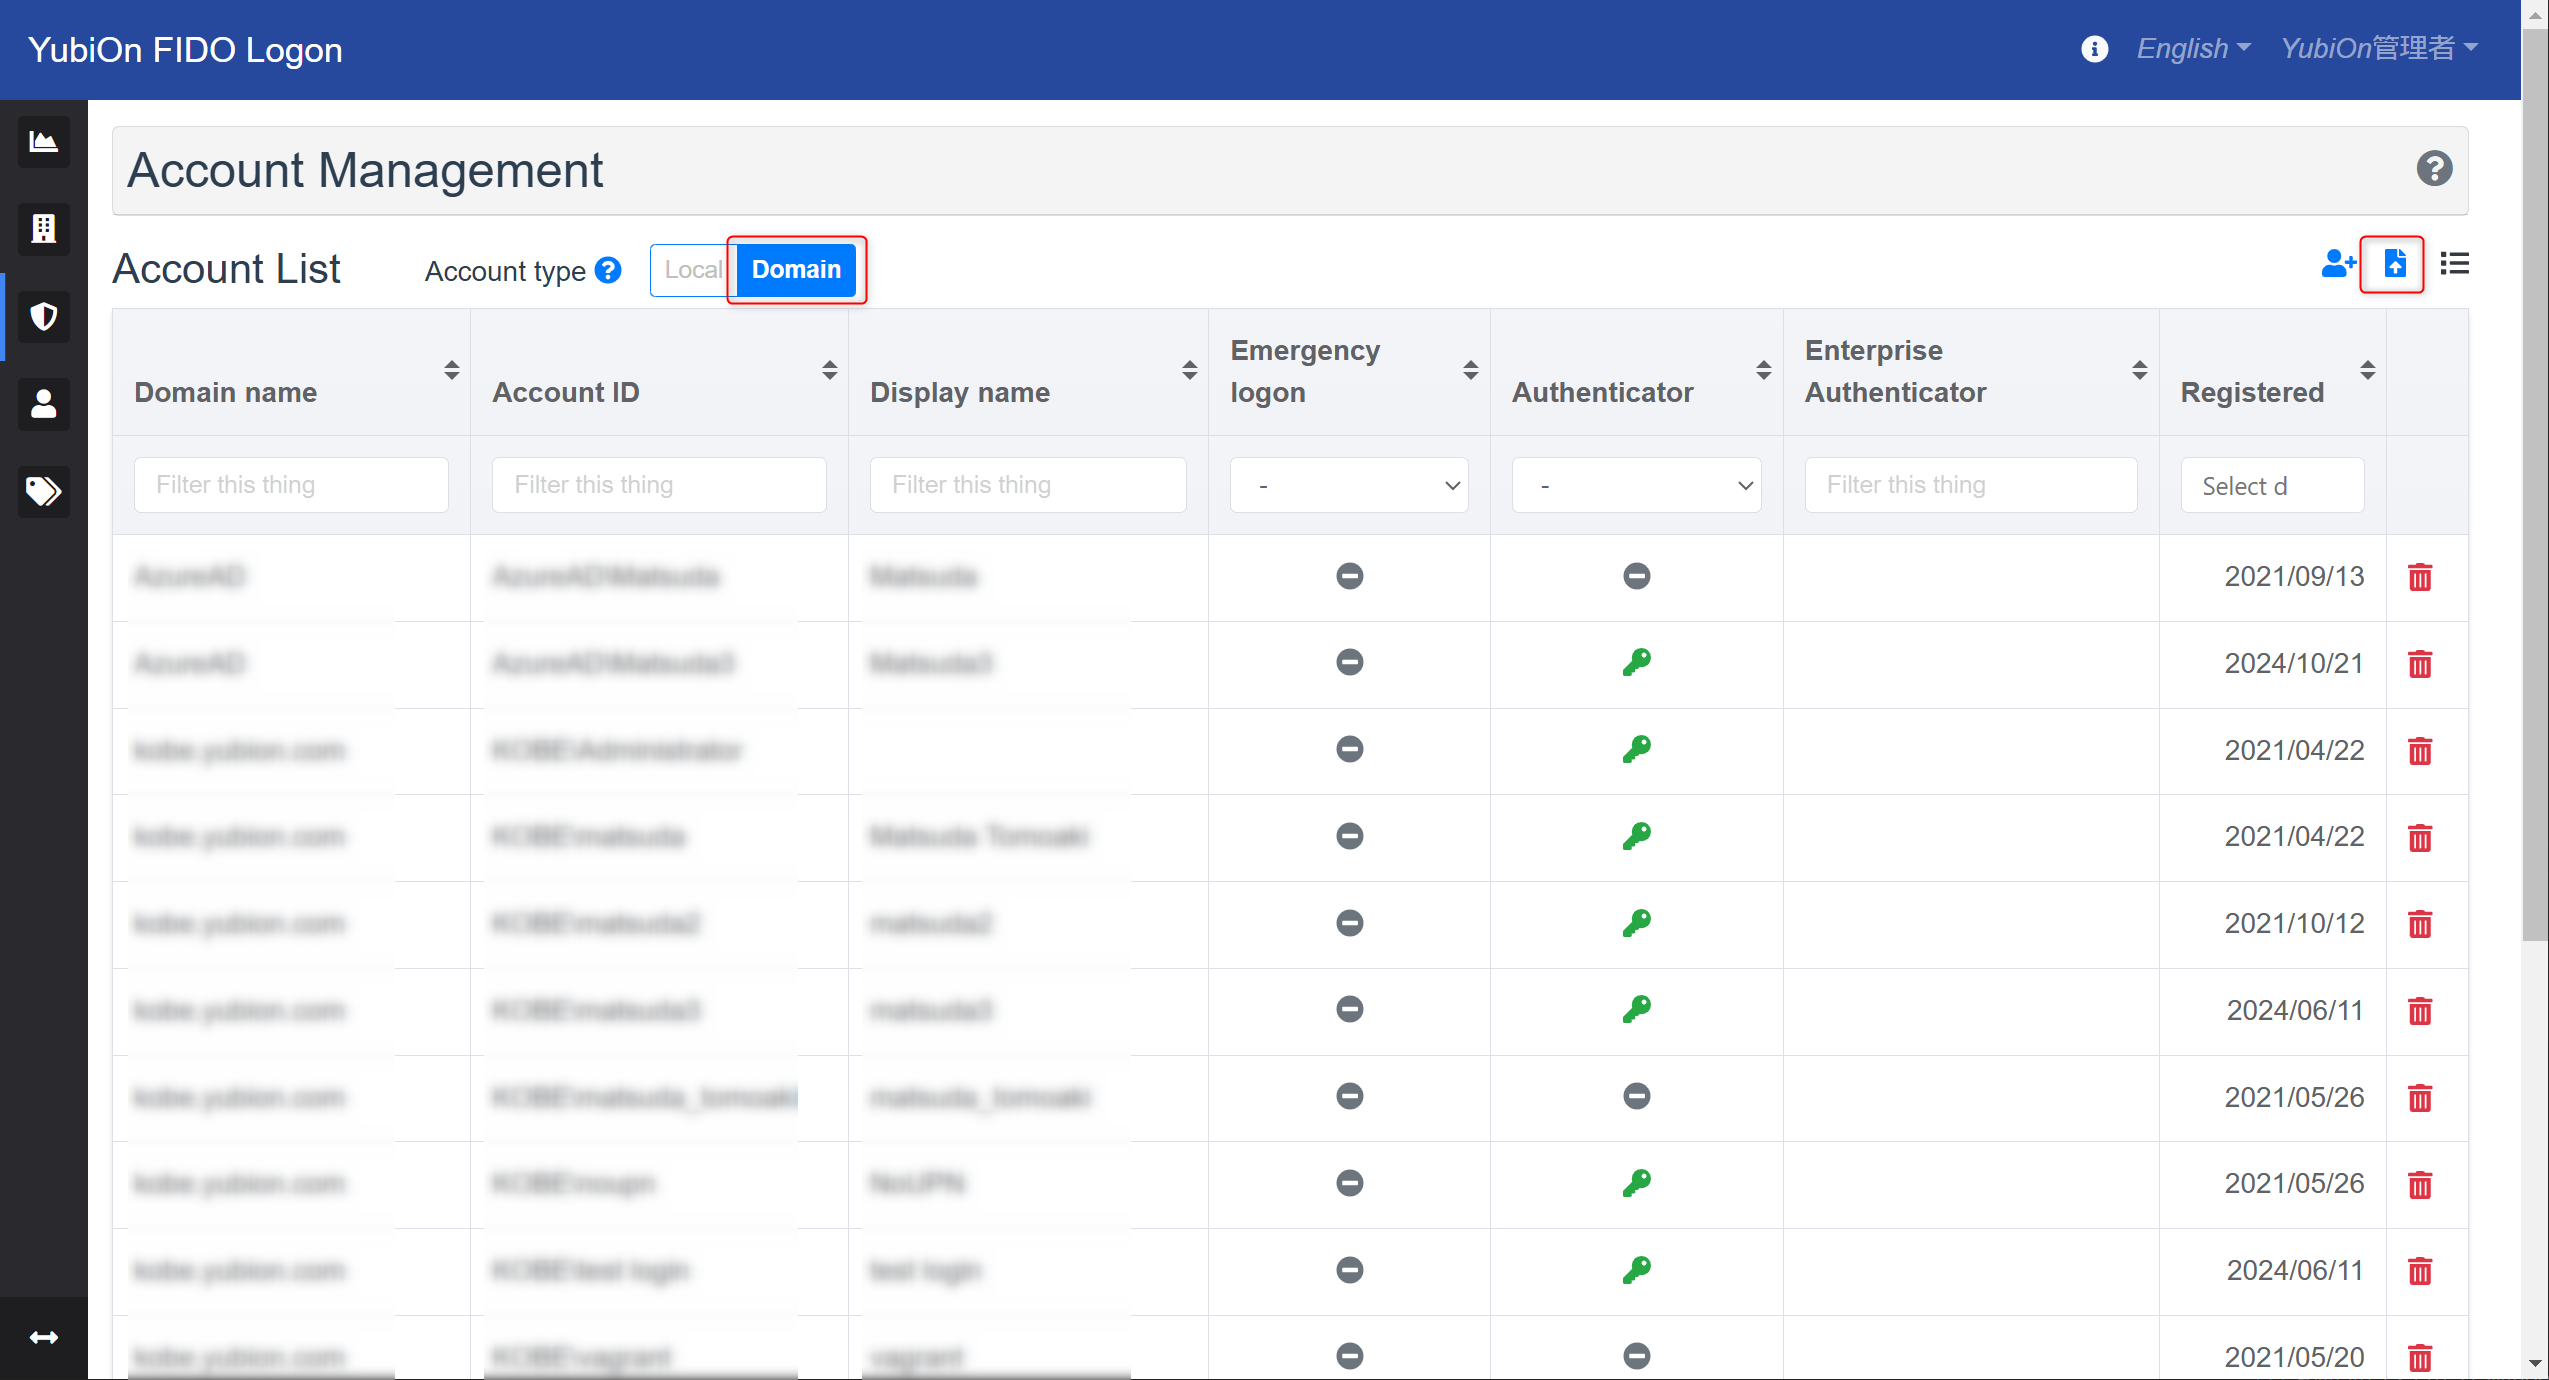
Select Domain for the account type, then click the bulk assignment icon at the top right of the domain account list.
-
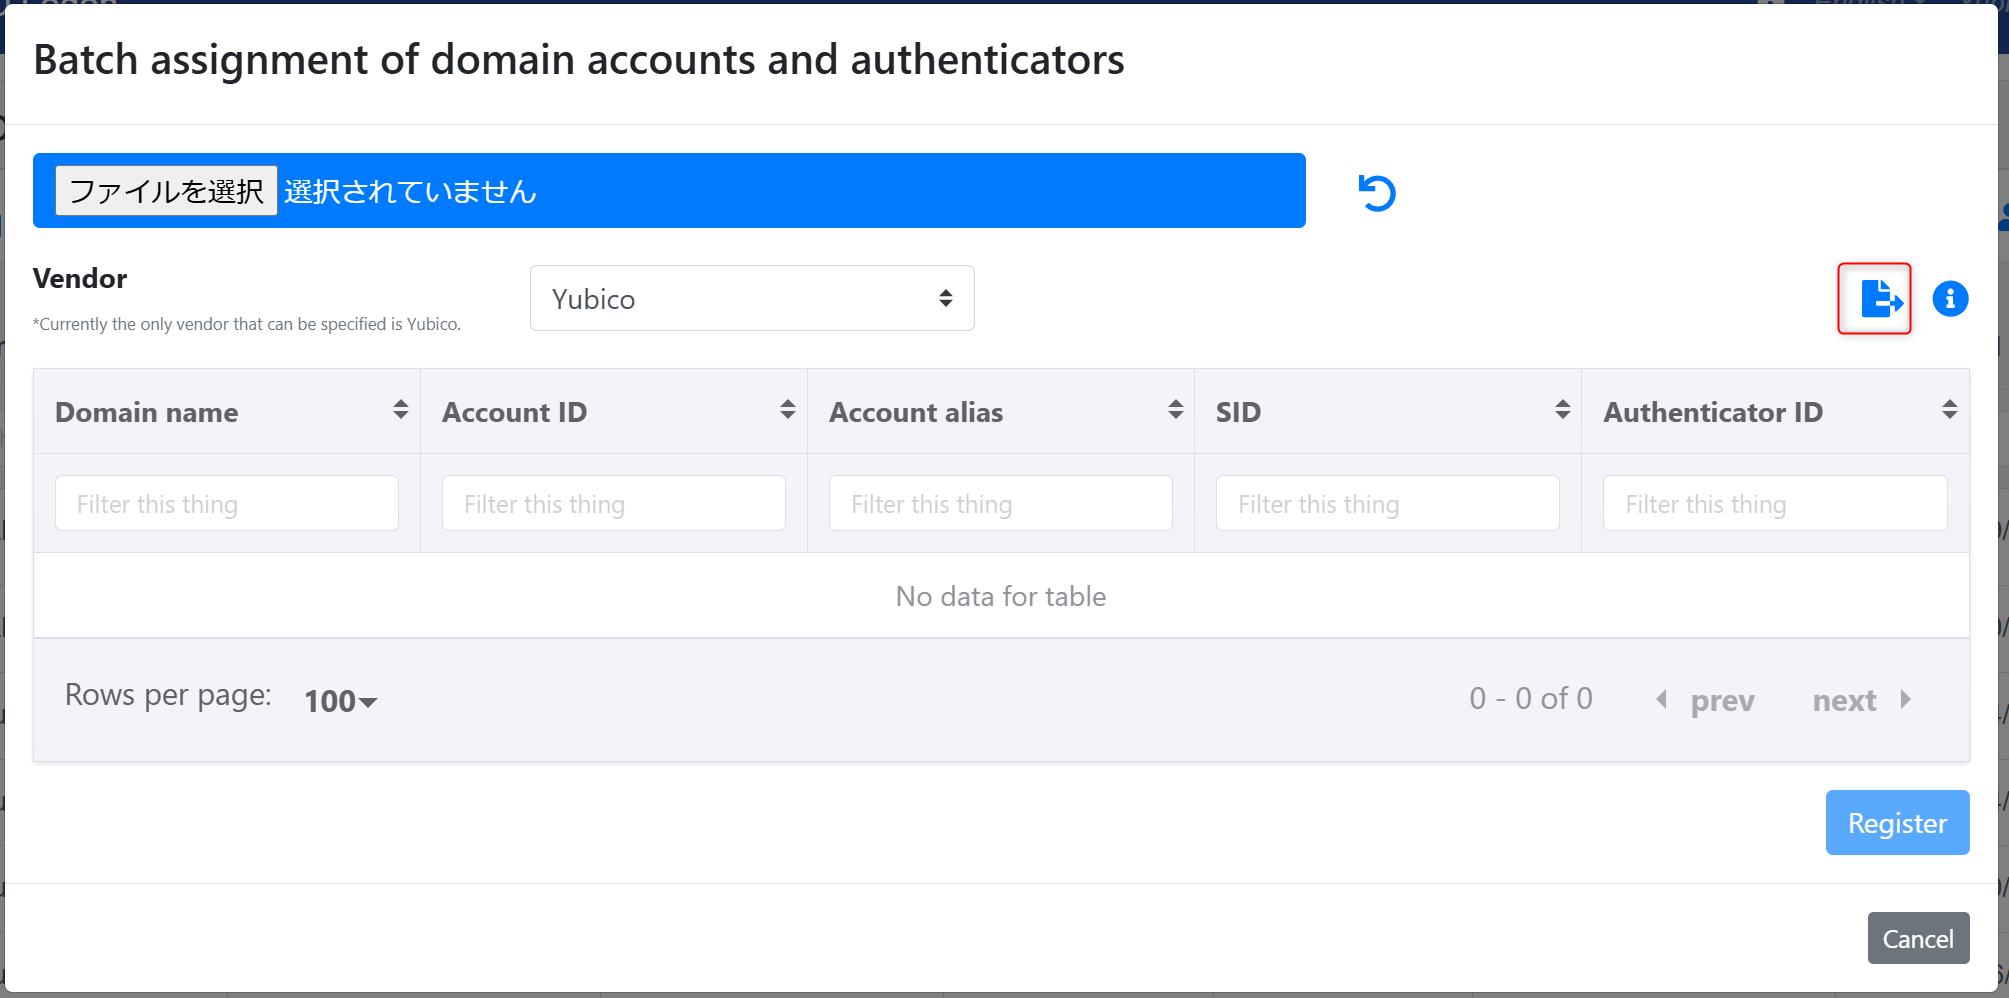
In the Bulk Assignment modal, click the export icon at the top right to export the current domain account list as a CSV file.
-
Open the exported CSV file in an editor or Excel and follow the format below.
Enter the authenticator ID for the domain account you want to assign.
Remove rows for accounts that will not have an authenticator assigned.CSV Format
- Domain Name: Required. Enter the domain name. Do not modify the exported value.
- Account ID: Enter the account ID. Do not modify the exported value.
- Display Name: Enter the display name. Do not modify the exported value.
- Account Alias: Enter the alias (UPN). Do not modify the exported value.
- SID: Required. Enter the account SID. Do not modify the exported value.
- Authenticator ID: Required. Enter the authenticator ID. (For Yubico authenticators, the ID is engraved on the device.)
-
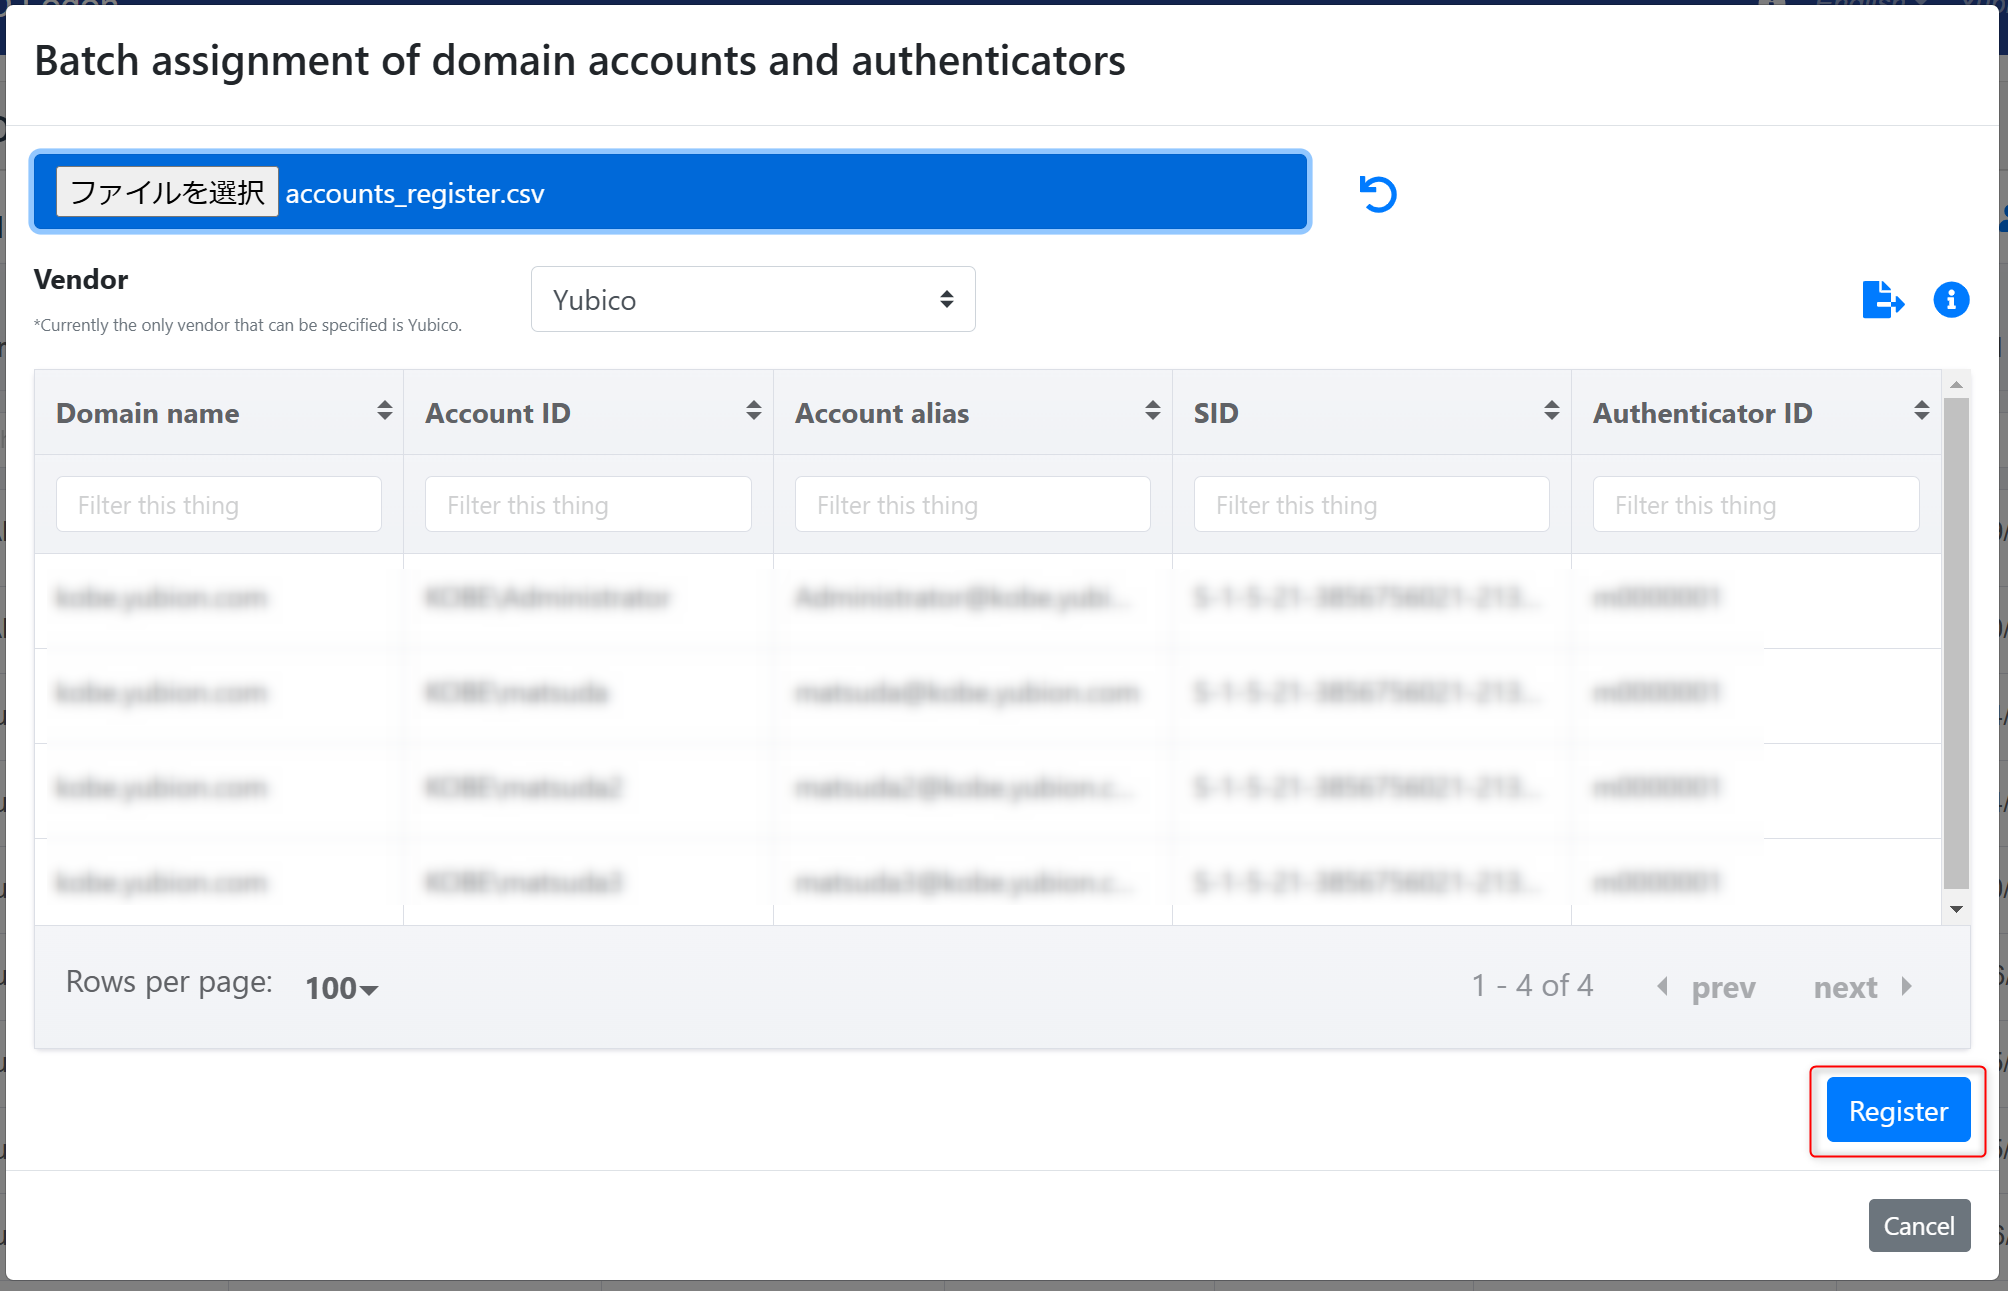
Select or drag and drop the CSV file for registration.
-
Verify that the information in the CSV file is correct and click the Register button.
Confirm by clicking OK in the message prompt.
-
If the registration is successful, the assigned authenticator ID will appear in the Enterprise Authenticator column of the account list.
Setting from the Enterprise Authenticator Screen
In the Enterprise Authenticator screen, you can assign accounts to authenticators.
Operation Procedure
Assign to One Authenticator
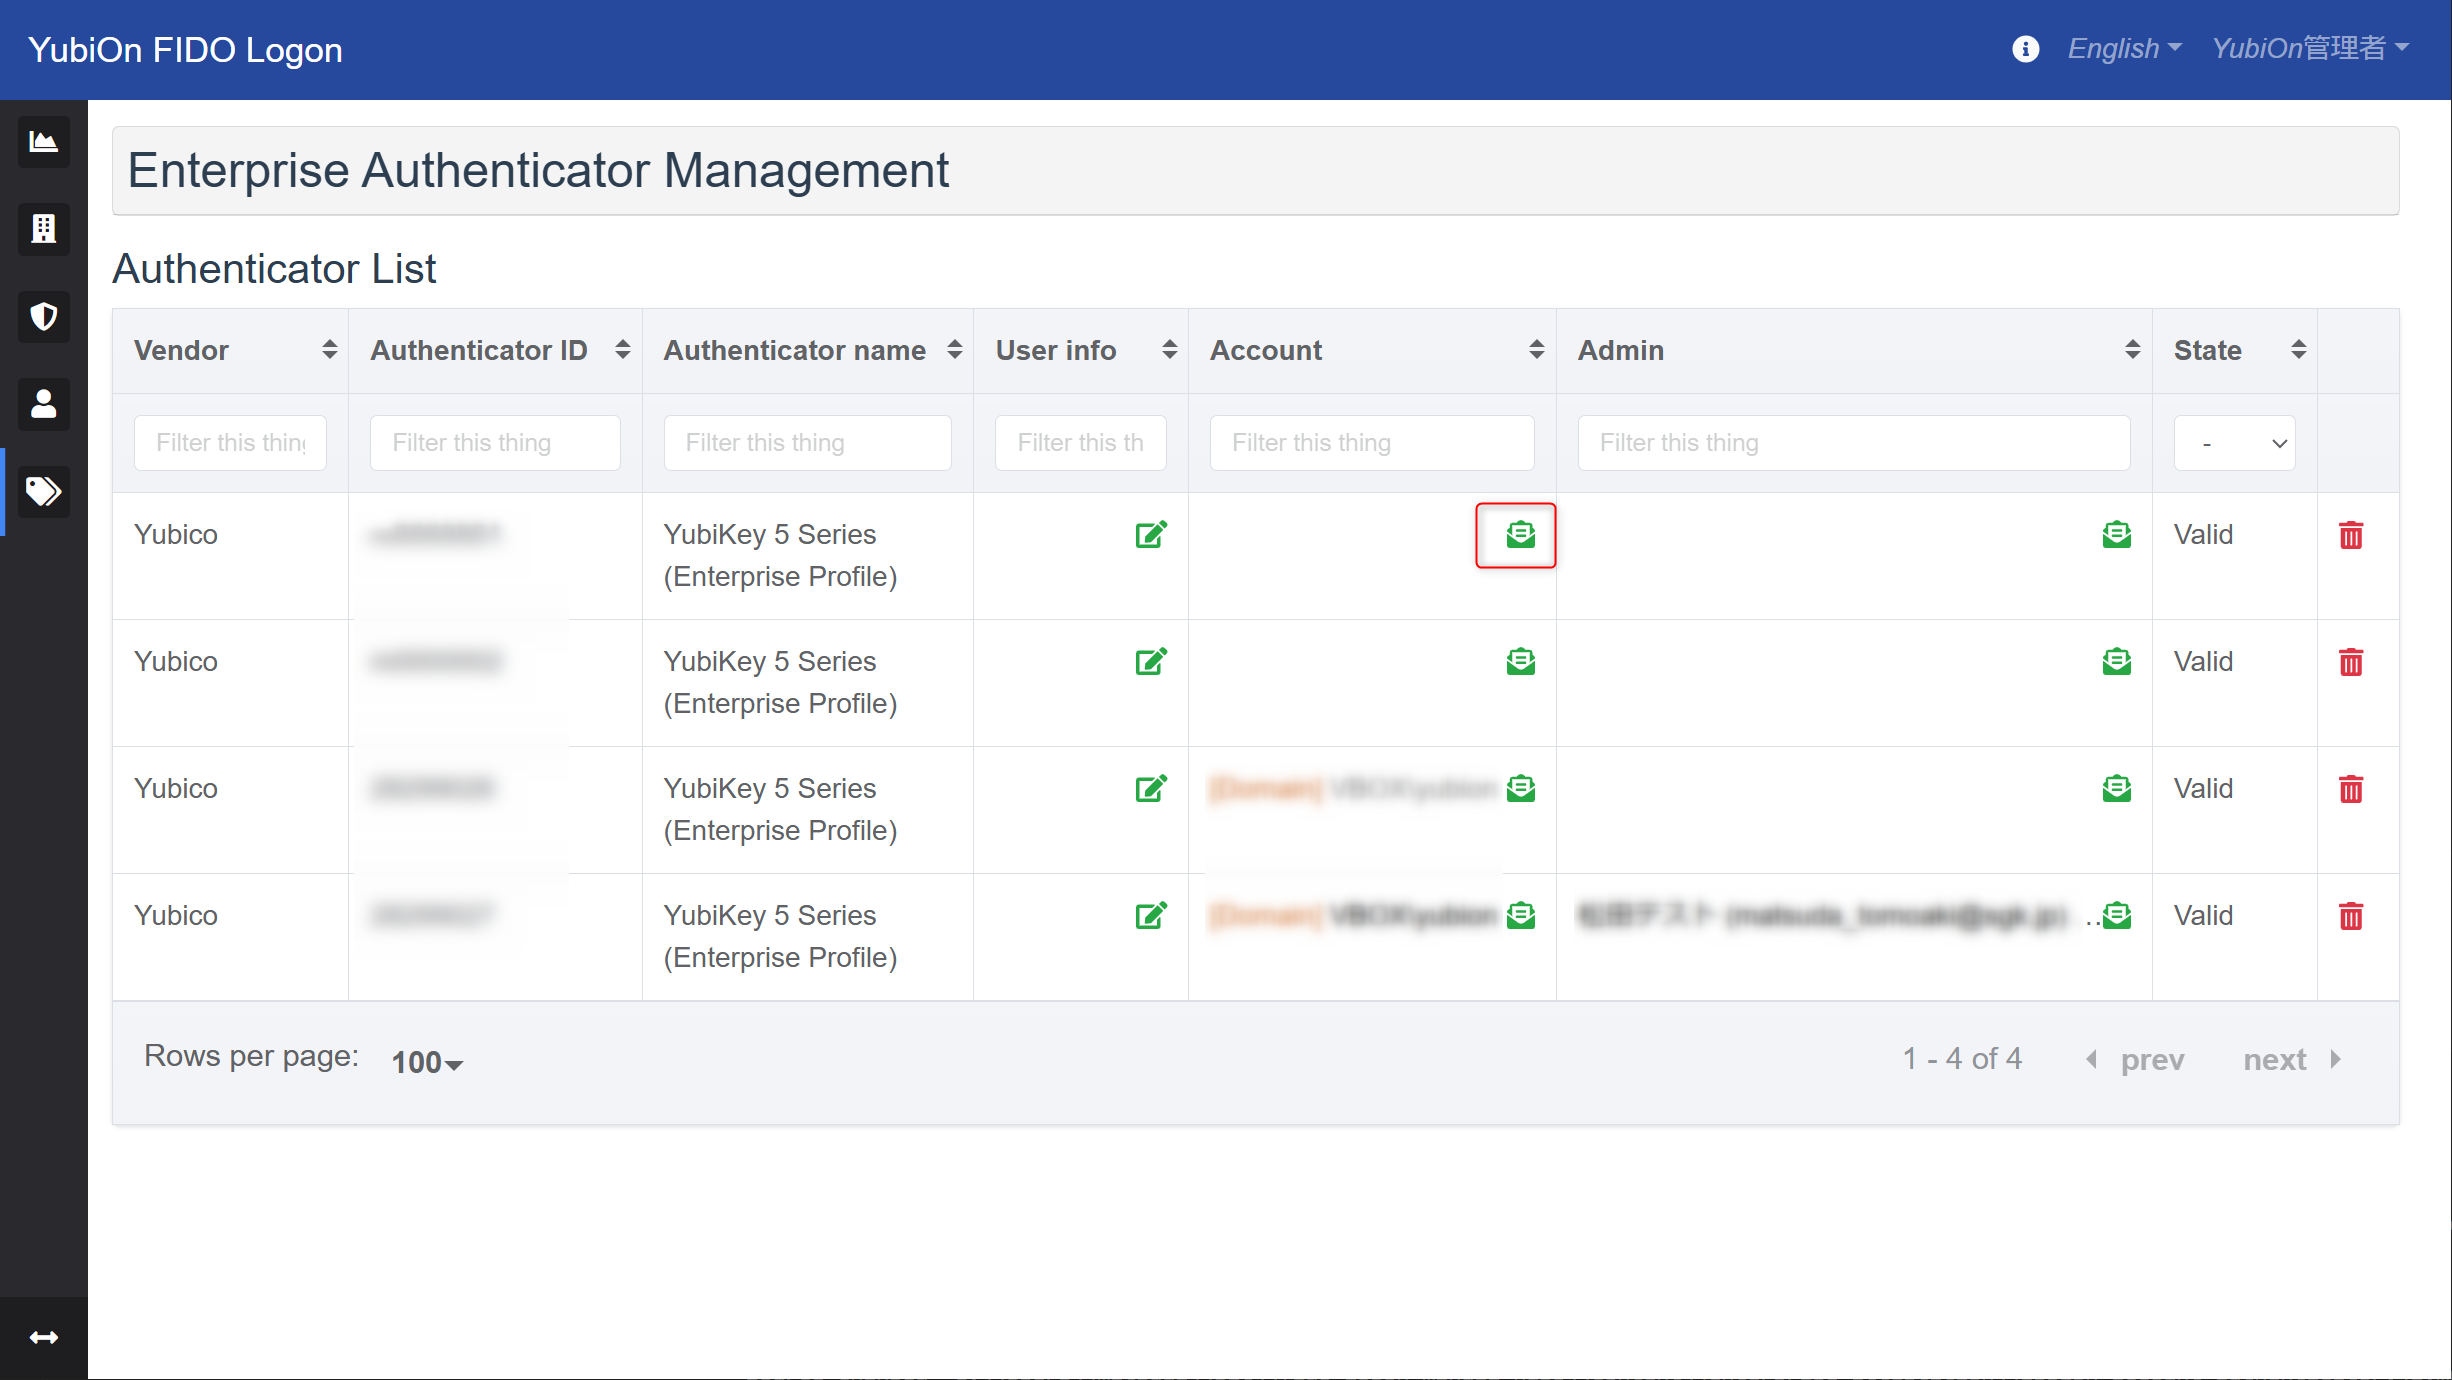
Select “Enterprise Authenticator Management” from the menu.
-
Click the icon in the Account column of the authenticator you want to assign.
-
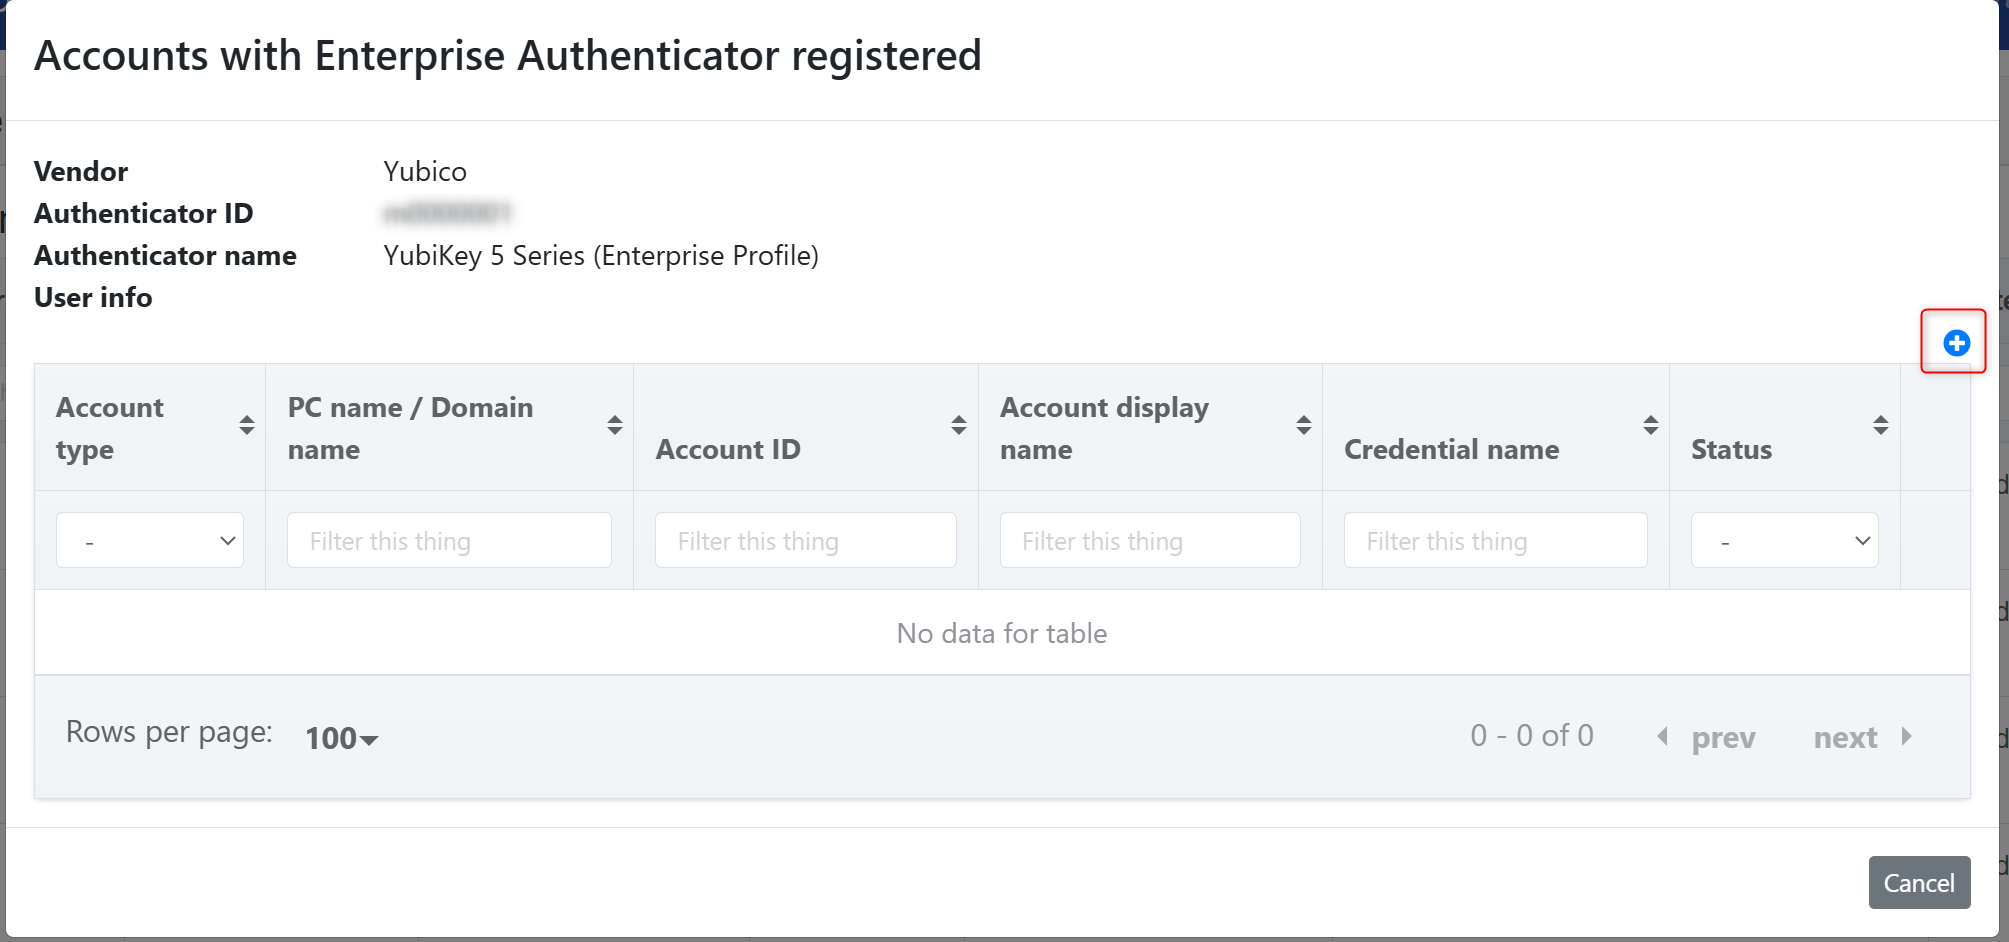
In the modal for the authenticator’s associated accounts, click the add icon at the top right.
-
Select the account you want to assign from the list and click the Assign button.

-
If the registration is successful, the assigned account will appear in the authenticator’s associated account list.
Initially, the status will be displayed as Assigned until the actual registration is completed.
The assigned account information will also appear in the Account column of the authenticator list.